Sunday, August 19, 2012

Sparkling Peach Sangria with Strawberry Simple Syrup


Everything is better sparkling, right?  That's what I think, especially when it comes to sangria.  The other day I was thinking about how much fun this summer has been.  We've actually done a lot and I think hit all the "must-do" summer activities.  Go to the beach - check, go to the pool - check, relax and read a book - check, do something a little crazy - check, BBQ - big check :) But after mentally going through the past few months, I realized that something was missing.  Sangria!  I realized that I had not made this delicious and casual afternoon drink for at least a year! Time to change that.

Sangria takes your favorite wine (red, white, or sparkling in my case) to a new level with the addition of fresh summer fruit.  Amazing.  I tend to prefer white sangria over red...   I think it stems from my first date with Chris a lonnnnng time ago at Jaleo in Bethesda, MD.  Jaleo is an incredible tapas restaurant by the famed Chef José Andrés.  It was over a pitcher of Jaleo's famous white wine sangria that I really got to know my future husband.  So not only do I just generally like booze with fruit in it, it also has a special meaning :)


This sangria is something I put together after a trip home from the farmers market.  (Most recipes start out that way, right?) These beautiful white peaches were calling my name, so the peaches, strawberries, oranges and a few lemon slices were combined with my favorite - a bubbly Cava.  The secret ingredient to this sangria is a quick homemade strawberry simple syrup.  Sounds difficult, right?  It's not, I promise - all you need is strawberry, sugar and corn starch.  Throw all of those ingredients together in a small pot on the stove, and 10 minutes later you have your own simple syrup. It's so easy!  And the level of flavor and sweetness it adds to the sangria is a wow-factor.  Give this recipe a shot!


Ingredients
serves 4, to serve a larger group definitely double the recipe

1 bottle sparkling wine, Cava works best
2 large ripe white peaches, de-pitted and sliced
1 pint of strawberries, hulled and sliced
1/2 orange, peeled and segments sliced in half
2-3 slices of lemon
1/4 cup sugar
2 tbsp corn starch
1/2 cup water


Method

To make simple syrup - combine about 10 sliced strawberries in a saucepan with water, sugar and corn starch.  Heat on medium-high heat for about 5-6 minutes until the syrup starts to thicken.  You might have to make some adjustments - add more corn starch if it is not thickening, too thick add more water.  Once thickened, let cool to room temperature.  Use a strainer and strain strawberries from the rest of the syrup.

In a glass pitcher add the peaches, the rest of the strawberries, orange segments and lemon slices.  Next uncork the champagne (a "whooooo" is mandatory) and slowly add it to the pitcher.  If you add too much at once, you will overflow.  Lastly, add the strawberry simple syrup and ice.  Give it a good stir and serve to your lucky guests!   Enjoy the summer!!


Wednesday, August 15, 2012

Summertime Rolls with a Peanut Dipping Sauce


Are you in the mood for something fresh, exciting and flavorful?  If so, you are in luck :)  I made these summertime {historically spring} rolls last night and they turned out excellent!  Perfect dinner for the summer - you don't need the oven and you get to use all the fresh produce from the farmers market or garden! 

I majorly heart spring rolls.  They are definitely my favorite thing to order at any type of Asian restaurant.  When Chris and I were traveling all through SE Asia, I think I hit a world record number of spring rolls consumed by one person. It was relieving to bite into fresh, crunchy spring rolls after being out in the excessive heat of SE Asia.  I believe I had spring rolls with every meal!

Me being cheesy w/ my spring roll addiction.  Ho Chi Minh City, Vietnam

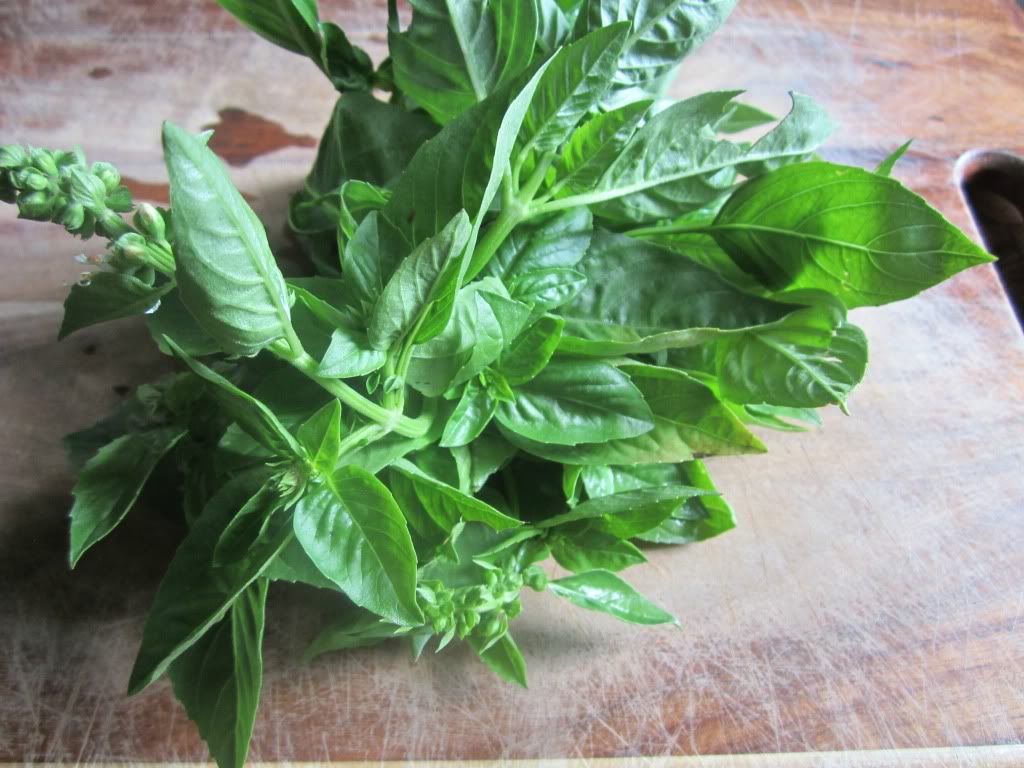
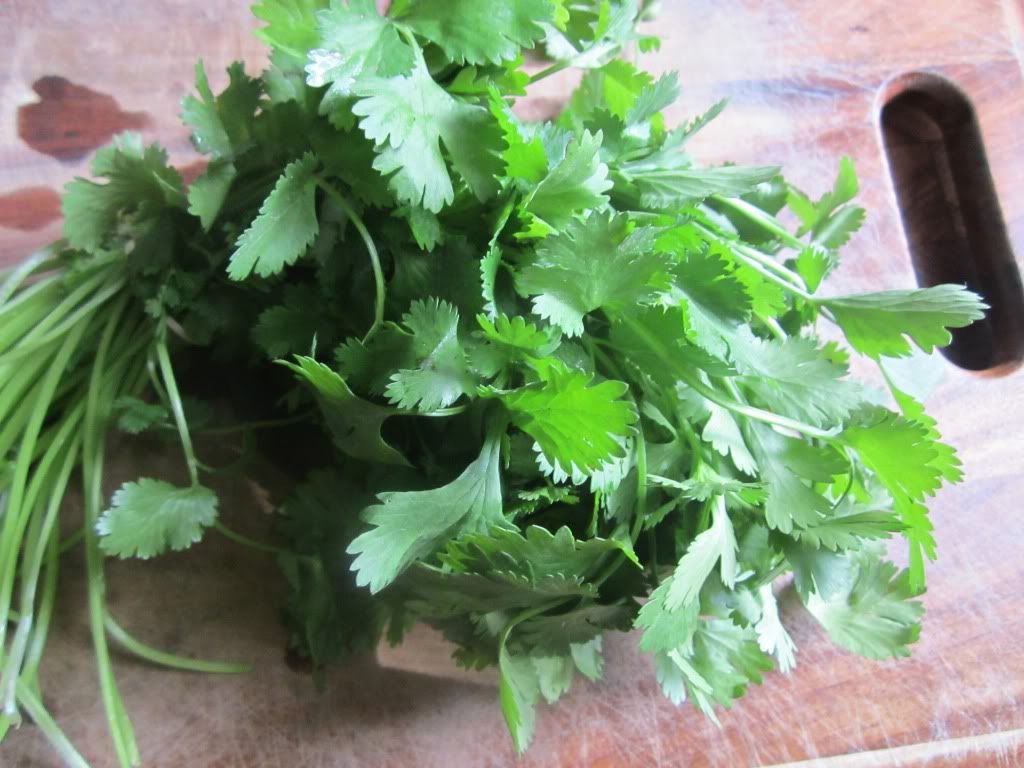
These summertime rolls are stuffed with a plethora of summer produce: crunchy iceberg lettuce, green onion, grated carrots, crisp cucumbers and sweet red peppers.  Then they are topped off with fragrant fresh basil and cilantro... which is a terrific combination of herbs for this type of dish.


Did I mention they also have shrimp?  This time I sauteed the shrimp in a thai chili sauce, which really ties all of the ingredients together.  The best part of the spring rolls, other than the explosion of freshness in your mouth, is a delicious peanut dipping sauce.  (The peanut sauce is so good that I actually used it to dip cucumbers and baby carrots in the next day, and I think it can be easily turned into a salad dressing).  This peanut sauce is sooo good and tastes great with these spring rolls.  My advice - double dip :)


Ingredients
makes 12 rolls

For the Summertime Rolls -

12 spring roll wrappers (plan on having a few extra in case a couple break)
1/2 of a head of iceberg lettuce, thinly sliced
1/2 of a sweet red pepper, thinly sliced
1/4 cup fresh basil, thinly sliced
1/4 cup fresh cilantro, thinly sliced
1/2 cup shredded carrots
1/2 of a cucumber, sliced thinly, larger slices cut in half
3 or 4 stalks of green onion
1/2 lb of small uncooked shrimp, peeled and deveined
1 tbsp peanut oil
2 tbsp of thai chili sauce


For the Peanut Dipping Sauce -

1/2 cup peanut butter
1/2 cup lite coconut milk
1 1/2 tbsp lime juice
1 tbsp brown sugar
1 tbsp soy sauce
1 tbsp minced garlic


Method

First make the peanut sauce.  I found the easiest way to do this is in a food processor.  (I will say this a hundred times, it is the most useful tool in the kitchen!) Process the peanut butter, coconut milk, lime juice, brown sugar, soy sauce and minced garlic for about 10 seconds.  Put peanut sauce in a container and refrigerate while making the rest of the rolls - it tastes great cold. 

In a skillet, heat the peanut oil until hot.  Add shrimp and then add the thai chili sauce.  Saute for 2-3 minutes until shrimp are pink.  Set aside.

To assemble the spring rolls I laid out all the prepared vegetables on a large cutting board.  I used a second cutting board for assembling the rolls.  The tricky part is the spring roll wrappers.  To get them soft, fill a round, medium-sized saute pan with 1/2" of water.  Place wrapper in water for only 10 seconds, not any longer.  The wrapper will seem stiff, but will soften as you work with it.

To finish the spring rolls, I topped the ingredients in this order, but feel free to do it your own way: Lettuce, basil, cilantro, green onion, shredded carrots, cucumber, red pepper and lastly shrimp.  Then simply fold them up like a burrito.  The secret is to not fill them too much and wrap them as tighly as possible.  It's okay if it takes you a few times to get the hang of it, my first few tries were pretty interesting :)  Serve with chilled peanut sauce and enjoy!

  
This recipe is inspired by The Food Matters Project which focuses on whole food recipes by Mark Bittman.  This week the Food Matters Project was hosted by Alyssa at Everyday Maven.  Check out what other inspiring bloggers did here.

Friday, July 27, 2012

Colossal Cookies: White and Dark Chocolate Chip


These cookies are huge.  Colossal in fact.  These gigantic gourmet cookies taste so incredible, they're amazing straight out of the oven, and even at midnight with a bowl of ice cream.  At least that's what I heard...... :)  I made these buttery, sugary, yeah-I-know-they're-not-good-for-me cookies last night.  I was having one of those days and by the time 9pm rolled by, I was overwhelmed with the desire to make some kind of cookie.  But I didn't want ordinary chocolate chip cookies, I wanted gigantic gourmet cookies.  Why do large thick gooey cookies always seem better???  I have no idea expect for the fact they just are!

The good thing about cravings for chocolate chip cookies is that most people almost always have all of the ingredients on hand.  The other good thing about chocolate chip cookies is that they only take 10 minutes to whip up, and 20 minutes to bake.  These cookies, though colossal, are no different.  The contrast of milky white chocolate and bittersweet dark chocolate chips in every cookie taste amazing.  Next time I might add in some nuts, but this time it was all about the chocolate! Next time you are at home and can't get chocolate chip cookies out of your mind, try these :)


This is one of the only recipes I'll tell you to not swap out whole wheat flour for all-purpose, reduce the butter, or find a way to "healthify" it.  Normally I'm all about eating more vegetables, less animals and the sort.  But sometimes we need to take a step back and remind ourselves - "Life's too short, just eat the cookie!!"  Greatest saying ever, thanks Mom :)

Ingredients
makes about 18 cookies, recipe adapted from AllRecipes.com

2 cups all-purpose flour
1/2 teaspoon baking soda
1/2 teaspoon salt
3/4 cup unsalted butter, melted
1 cup packed brown sugar
1/2 cup white sugar
1 tablespoon vanilla extract
1 egg
1 egg yolk
1 cup white chocolate chips
1 cup dark chocolate chips

 Method

Preheat the oven to 325 degrees and line a cookie sheet with parchment paper. (Makes for a very easy clean up!)  In a small bowl combine the flour, baking soda and salt.  

With a mixer (stand or hand held) mix together the melted butter, brown sugar, white sugar untill well blended.  Next add in the vanilla, egg, and egg yolk and beat till light and creamy.  Carefully mix in bowl of flour, baking soda and salt until just blended.  Stir in the chocolate chips by hand using a wooden spoon. Drop cookie dough 1/4 cup at a time onto the prepared cookie sheets. Cookies should be about 3 inches apart. 

Bake for 18-20 minutes untill the edges are lightly toasted.  Depending on  the type of pan, the cookies may take an additional 4-5 minutes (I also like mine slightly under-done).  Cool on a baking sheet for a few minutes and then transfer them to a wire cooling rack to cool completely.  Serve immediately or at midnight with a bowl of ice cream!! 


Monday, July 23, 2012

Raspberry Cabernet Sorbet


I think it has been the hottest summer ever.  Over the weekend Chris and I had tons of great ideas - we were going to go for a hike with the dog, paddleboard on the lake, and maybe end the day dine alfresco and hit up the outdoor patio of our favorite wine bar.  I had been out of town with my girlfriends the weekend before so we wanted to get some fresh air and enjoy a just-him-and-me date night.   That soo didn't happen - why? Because it was ungodly hot in Charlotte with 500% humidity.  It hurt to breathe outdoors.  So instead we ended up going to the movies and drinking wine indoors :)  Nothing is better than sitting, indoors and drinking wine!!  Outdoor activities?  Nope, not in this heat!

So this dessert is absolutely perfect for this time of the year and very easy to make.  It combines two of my favorite things - red wine and icy sorbet.  This sorbet is different than the typical sorbet as it contains some dairy, but the ingredients easily come together and you end up with a bright and delicious berry sorbet.  The cabernet adds a nice layer of flavor and also helps break down the raspberries.  Next time you are craving a cool and refreshing treat I highly recommend you try this boozy sorbet!


Ingredients
recipe by Mark Bittman

12 oz frozen raspberries
1/2 cup non-fat plain yogurt
3 tbsp sugar
3 tbsp cabernet sauvignon


What the mixture looks like right before you add the final tablespoon of wine
Method

All you need to make this is a food processor!  Combine the raspberries, sugar, yogurt and 2 tablespoons of wine and process for 2-3 minutes.  Add the additional tablespoon of wine and process for another 1-2 minutes, but make sure the sorbet doesn't liquify from over processing.  I think the sorbet needs about 1-2 hours in the freezer to firm up, but you can serve immediately if you need to.  Stay cool and enjoy!


Tuesday, July 17, 2012

Corn and Manchego Tri-Color Quinoa Salad


Do corn and tomatoes mean summer to you?  They do to me, especially tomatoes as you've seen here, and here. Growing up my family spent a lot of time at my Grandmom's summer house on the Maryland Eastern Shore and at the beach where both corn and tomatoes are grown in abundance.  Corn on the cob was almost always served at dinner.  My family liked to eat it slathered in butter with lots of salt and pepper... Mmmm, so good. Unfortunately today I realize it's probably not the best thing to eat every weekend. So I decided to take two of my favorite summer ingredients and combine them in a way that is healthy and flavorful!


This dish is tied to together not only by pretty tri-color quinoa (I used tri-color because it is pretty, but regular also works), but cilantro, lime and of course, manchego cheese.  I don't use manchego cheese a whole lot, but it's buttery texture truly makes this dish.  Try to buy a good quality manchengo if you can.  This dish is the perfect meal to make a big batch of and take for lunch or use as a dinner side.  It so delicious!
Local Silver Queen from the farmer's market
Ingredients
serves 4

2 ears of corn or two cups of frozen corn
1 tbsp butter
1/4 cup minced vidali onions
1 tomato diced
2 tbsp cilantro
1 lime, juiced
salt
pepper
4 oz manchego cheese, grated
1 cup of cooked quinoa


Method

In a large skillet, melt a tablespoon of butter over medium heat.  Add 1/4 cup onions and saute for 2 minutes.  Add two cups of corn and saute for another 5 minutes.  Add diced tomato, cooked quinoa, salt and pepper.   Let cook for another 8-10 minutes.  Lastly add the cilantro, lime juice and grate the manchego cheese over the dish.  Stir together and serve in a bowl.  Enjoy!


This recipe was inspired by this week's Food Matters Project recipe - Corn Avocado Salad. This is my take on a similar but avocado-less recipe :)  Get the original recipe here! And check out everyone else’s take here.

Tuesday, July 10, 2012

Parmesan Honey Sweet Potato Chips


Annnnd we're back!  Whhheww, that was an extended blogging/ just need to chill break.  It was a good break and now I am so excited to start sharing recipes with you all again.  During my break, I was still cooking, but I was most re-making my favorite recipes and eating lots of simple fruits and vegetables.  I feel like a regular at my local farmers market!!  Such a great feeling!

One of my all-time favorite veggies are sweet potatoes.  They are a super food, and super good for you.  I like them because they satisfy my carb cravings yet fill me with nutrients.  This time I decided to turn them into chips - with a vegetable peeler!  It's pretty easy and there's no need for any fancy cutlery, or a mandolin.  I wish I would of starting doing this earlier.

I decided to use the first few peels with the skin because the potato skin also has a lot of nutrients.  (Though you could peel the potato first and then just use subsequent peels if you don't like the texture of the skin).   Salty parmesan and sweet honey come together and compliment these crispy chips.  They are addictive as a snack and make a fun side dish!

 Ingredients

2 small sweet potatoes or 1 large sweet potato
1/2 tsp garlic powder
1/2 tsp salt
1/2 tsp paprika
1 tbsp honey (I used local sourwood honey)
1/4 cup shaved parmesan
drizzle of extra virgin olive oil
freshly ground pepper

Method

Pre heat oven to 375 degrees.  Start to peel potato into strips and keep going.  (I used a medium sized mixing bowl for the potato peels which I recommend because it was easy to then mix all the seasonings and potato peels in).  Now add in the olive oil, garlic powder, salt, pepper, paprika, honey and parmesan.   Mix together with your hands until evenly coated.  Line a baking sheet with parchment paper and spread the sweet potato peels on the sheet.  Bake for 20-25 minutes till crispy.  Enjoy!


This recipe was inspired by this week's Food Matters Project recipe - beet "sandwiches".  This is my take on a similar but beet-free recipe :)  Get the original recipe here! And check out everyone else’s take here.

Tuesday, June 5, 2012

Tomato Mozzarella Crisp w/ Oats & Walnuts


The month of May I was traveling, a lot.  And while traveling I tend to try to make healthy choices, but I don't hold back.  Why would you?  Beer battered Hogfish?  Sure!  Another glass of wine?  Of course!  So in between trips I tend to detox - sauted veggies for dinner, lots of smoothies, and I go easy on carbs and meat.  But even after a jam packed weekend away, I had to try out this tomato recipe from The Food Matters Project.


I love tomatoes!  Do you?  Awesome, we're in for a good summer then.  In the past year I have discovered several new farmers markets that were under my nose that I hadn't yet been to.  I think tomatoes are one of the friendliest, easiest summer vegetables to find locally, and cook with.  Hands down.


This is a recipe that can be modified throughout your entire summer.  This recipe would also be great to serve guests as a summer side dish with bbq.  The ripe red tomatoes are sliced into wedges and topped with fresh mozzarella, parmesan, bread crumbs, rolled oats and garlic.  Fragrant fresh basil really ties the whole dish together!


I waited till today to make this week's recipe so I could visit the farmers market and get some local yummy ripe tomatoes!  This week Nicole of The Giving Table hosted Mark Bittman's Savory Tomato Crisp.  

Ingredients

3 lbs ripe tomatoes, cut into wedges (preferably local)
3 tbsp extra virgin olive oil
1 tbsp cornstarch
1 cup bread crumbs (preferably whole grain and homemade w/ a food processor)
1/2 cup rolled oats
1/2 cup chopped walnuts
1 tbsp minced garlic
1/4 cup grated Parmesan, plus a little more for topping
4 oz fresh mozzarella, cubed
2 tbsp fresh basil, chopped, plus a few leaves for garnish
Salt and black pepper
 
Method

Preheat oven to 375 degrees.  Spray a deep pie dish or round baking dish with non-stick cooking spray or extra virgin olive oil (use a misto!)

In a large bowl, place the tomato wedges and sprinkle with the cornstarch, and salt and pepper. Toss gently and let the mixture sit. In another bowl, combine the bread crumbs, oats, walnuts, garlic, parmesan cheese, mozzarella cheese, 3 tablespoons and olive oil.  Season with sea salt and freshly cracked pepper. Stir until thoroughly mixed.

Toss the tomato mixture again and transfer it to the prepared baking dish. Sprinkle with the bread crumb topping. Bake until the crisp is as dark as you like on top and bubbly underneath, 40 to 45 minutes. Let cool to warm or room temperature before serving. To serve, scoop portions out with a large spoon. Comment Enjoy!


Saturday, May 26, 2012

Happy Memorial Day!


Happy Memorial Day!!!  This weekend is officially the start of the summer!  To celebrate, I am headed down to Key West to stay at a friend's house for some R&R and girl time.  While getting ready for the holiday weekend, I honestly haven't been cooking anything Cheese Please worthy :)  Unless you count enormous bowl's of sauteed kale, tomatoes and goat cheese.  If you need something low carb, very healthy yet really quick to cook  - try it out.  It's been my go-to, and I have to admitt I had it 3 times this week and for dinner last night... slight obsessed

Anyways, while I'm away (and hopefully having fabulous meals I will be re-creating for all of you), I'll leave you guys with some great past recipes I think would be phenomenal for this Memorial Day weekend! 

Watermelon Feta Salad - this is so delicious, great for bbq's too
Viet Grilled Chicken - delicious recipe for when you're grilling out
Shrimp Chorizo Burgers - spicy, sultry, yum
Grilled Rum Peaches with Mascarpone Cheese and Orange Blossom Honey - enough said
Chocolate Toffee Shortbread Bars - bringing these delicious guys down with me to Key West!

Have a great weekend!!!!!

Tuesday, May 15, 2012

Rustic Tomato Cheese Tart


Do you know those small mini magazine's you see at the grocery store while waiting in line to check out?  They aren't full sized magazines like Food and Wine or Cooking Light, they are the smaller ones. Normally these dedicated to holiday meals, brownies, or easy week night meals.  Sometimes I can't help but flip through them.  I think it's because they are mini sized magazines, and all things mini seem to call my name!

Anyways, today I spotted one with a rustic tomato cheese tart on the cover.  It was beautiful.  I was also starving at that exact moment and decided on the spot that I was scratching all dinner plans and making this gorgeous cheesy tomato tart!  (Even though you're not supposed to, I tend to always end up grocery shopping while hungry).  Unfortunately, the cashier interrupted my tomato cheese tart fantasy and yelled at me to hand over my grocery card.  Flustered from being caught fantasizing over a tomato cheese tart, I quickly handed my card over and started bagging my own groceries.  I never got to buy the mini mag, or scan the list of ingredients to mentally file them away.  Darn!


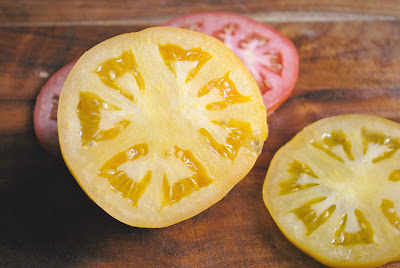
So this is what I imagine the recipe would say :)  Coincidentally I had made a previous stop at the farmers market for my orginal dinner plan, a bruschetta recipe chosen by Chef Laura as Home with The Food Matters Project.  I couldn't resist these gorgeous yellow and red local tomatoes, how pretty are they?  So instead of a classic bruschetta, I ended up with this tart!   So glad!  Thank goodness for mini magazines!!


Ingredients

1 sheet of frozen puff pastry, thawed on counter
1 tbsp extra virgin olive oil
1/4 cup goat cheese (approximately, use your own judgement)
1/8 tsp garlic powder
1 red tomato, sliced
1 yellow tomato, sliced
1 tbsp fresh basil
fresh parsley to garnish
non-stick cooking spray

Method

Preheat oven to 375 degrees.  Line a baking sheet with parchment paper and lightly coat with non-stick cooking spray.  Place thawed puff pastry on baking sheet.  Lightly brush with olive oil and sprinkle garlic powder on the puff pastry  Top with crumbled goat cheese, and then arrange slices of tomato in what ever patter you'd like.  Top with fresh basil and bake for 20 minutes.  Garnish with fresh parsley and enjoy!

This is such a great appetizer for the summer, I see myself making this again and again!


Friday, May 11, 2012

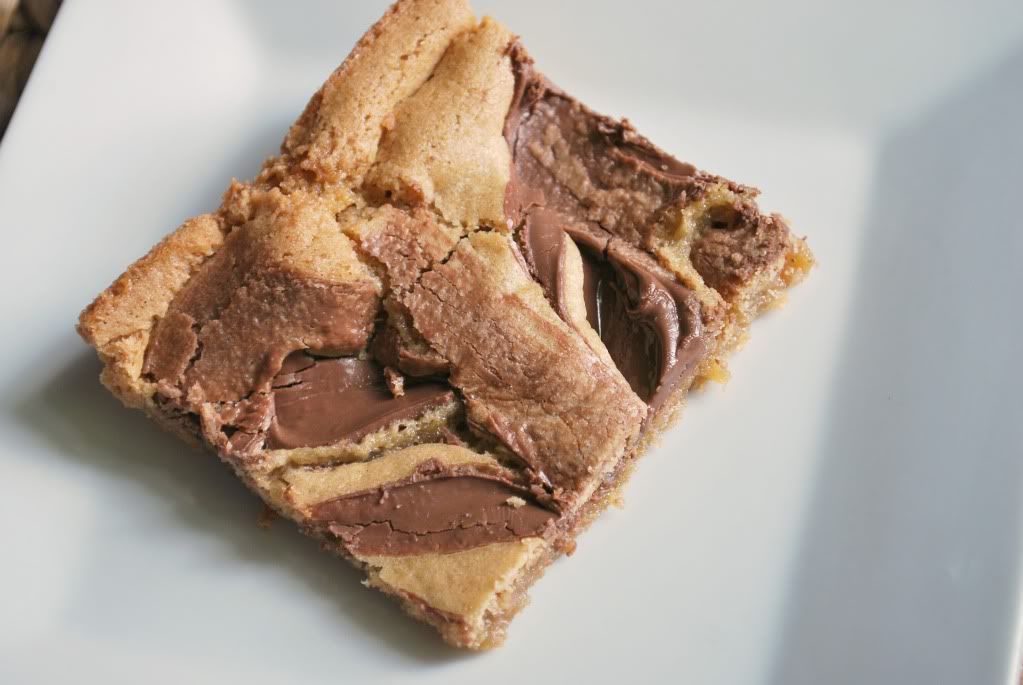
Blondies with Browned Butter & Nutella


Someone get this jar of Nutella out of my house!  It's doing evil things to me.  I'm aware of that jar at all times when I'm home.  It seduces me, gives me compliments and lures me to it.  Then afterwards, I feel guilty and remorseful.  No, we're not talking about dating, we're talking about the most amazing chocolate hazelnut spread on earth.  A couple of weeks ago I bought my very first jar of Nutella.  The jar's empty now. 

Did you know that when paired with Milton's multi-grain crackers, Nutella tastes like an E.L. Fudge cookie?!?  I kid you not. 

So when I needed a desert/thank you for letting us stay overnight gift for this weekend, I turned to Nutella.  I also have wanted to make a blondie for a long time.  Traditionally, blondies are essentially the same recipe as their cousin the brownie, but blondies use butterscotch instead of chocolate.  So, how about we swap out butterscotch, and add Nutella?  Sound good?  Okay, done.


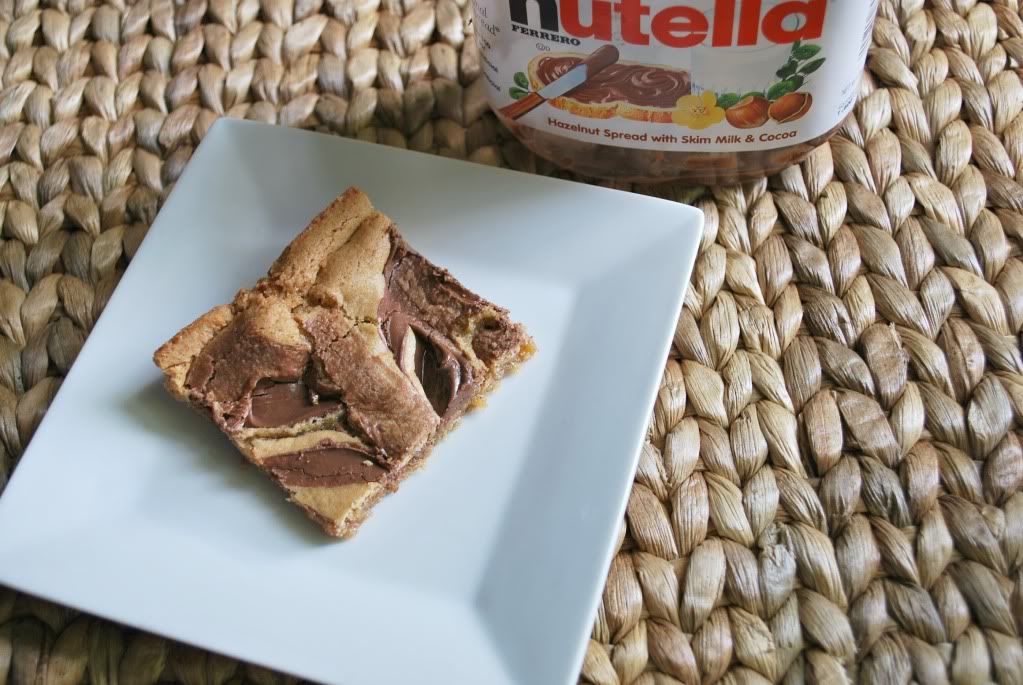
These blondies turned out amazing.  I decided to brown the butter first before putting adding into the rest of the ingredients.  Browned butter is also amazing, it transforms ordinary melted butter into a rich nutty, delicious butter.  This nutty flavor and aroma compliments the blondie base and the Nutella swirls.  Go get a jar of Nutella and make these!
  
Ingredients
Basic blondie recipe adapted from Mark Bittman's How to Cook Everything

1 cup all purpose flour
1/8 tsp baking soda
1/2 tsp baking powder
1/4 tsp kosher salt
1 cup packed light brown sugar
1/3 cup unsalted butter, browned
1 tbsp vanilla extract
1 large egg, at room temperature
3 1/2 tbsp Nutella

It's been good to know you Nutella, but we need a break.  It's not you, it's me

Method

Preheat oven to 350 degrees. Lightly grease an 8 by 8 baking pan and set aside.  Sift together the flour, baking soda, baking powder and kosher salt. Set aside.

Browned butter - for good instructions, go here.  In a large mixing bowl with a handheld mixer, mix together the packed light brown sugar, browned butter and vanilla extract.  Once combined, add in the egg and mix.  Slowly add in the dry ingredients until almost combined.  Take a spatula and fold the ingredients together.

Evenly spread the blondie batter into the baking pan. Measure out the Nutella. Drop the Nutella on top of the blondie batter. Drop the Nutella in three rows.  Swirl the Nutella up and down. Then back and forth.  Bake at 350 degrees for 20 minutes.

 Cool and then cut into squares. Enjoy!