Showing posts with label Fun. Show all posts

Tuesday, April 17, 2012

Mostly Whole Wheat Pizza Dough


Making your own pizza dough is really fun.  It's inexpensive, healthy and this recipe by Mark Bittman is extremely easy.  I found it to be extra fun because the smells of raised dough brings back many memories.... I have to admit something... my very first job in high school was working at Chucky Cheese's.  Don't laugh.  Of course the girl who used to work at Chucky Cheese, grows up to write a blog called Cheese Please :)  At Chucky Cheese I not only was a birthday party planner, I also made the pizzas in the kitchen!  I absolutely loved it.  Anyways, having fresh dough in the house made me think back to those days and laugh. 

Putting aside my cheesy past, this recipe is for you if you ever felt that making your own pizza dough would be hard.  That's what I always thought, but when Niki from Salt & Pepper choose it for this week's recipe for The Food Matters Project, I put my trepidations aside.

The dough is 2/3 whole wheat flour and 1/3 all purpose flour.  Other than that you just need salt, olive oil and a tiny bit of active yeast.  Side note: Active yeast is sold in a little packet found in the baking aisle of any grocery store.  I tell you this b/c I had no idea where you buy it, this was my first time! I combined all of these ingredients in the morning, and later that evening I made a pizza.  Easy breezy!  Mix, leave alone, roll out, top with ingredients.  That's it!


I decided to top my pizza with fresh mozzarella and my favorite simple ingredients.   (Make sure you buy halfway decent quality mozzarella, the cheap stuff isn't the same).  I probably could of added more veggies, but since it was my first time, I was worried about overloading the pizza and not have the dough cook through.  I also added some fresh basil from a plant that I recently bought.  Simple, yet delicious.

Ingredients
makes 1 large or 2 small pizzas

2 cups whole wheat flour
1 cup white whole wheat flour, or all purpose flour
1/2 tsp instant yeast
1 tsp salt
2 tbsp olive oil, plus more for greasing

marinara sauce (I used a jarred garlic-olive oil marinara)
toppings (I used green peppers, onions, and mushrooms all sliced very thin)
fresh mozzarella, thinly sliced
fresh basil
dried oregano

Method

Combine the flours, yeast, and salt in a large bowl. Stir in 1 1/2 cups water (I used warm water and also added in 1 tbsp olive oil).  The dough should be relatively sticky and wet, like biscuit batter.  If not, add a little more water.

Scrape down the sides of the bowl, cover, and put it in a warm spot. Let the dough sit for at least 6 or up to 12 hours. (The longer it ferments, the more complex the flavor.)

When you’re ready, heat the oven to 500 degrees. If you have a pizza stone put it in the oven at the same time so it can preheat as well. If not, generously oil a baking sheet or large ovenproof skillet. Dust your hands with a little white flour and fold the dough over in the bowl a few times. It will be sticky, but resist the urge to use too much flour; dust your hands again only when absolutely necessary and use a light, gentle touch. If you’re making small pizzas, divide the dough in half or quarters. Gently press the dough into the skillet or onto the baking sheet; it’s not important that the pizzas be perfectly round.  This dough tastes best when rolled out as thin as possible!!  But be careful not to tear the dough.  Note that pizza dough freezes really well; after dividing it, just wrap it tightly and use it within a couple of months.

Brush or drizzle the top of the pizza or pizzas with 2 tablespoons oil, cover, and let sit while you get your toppings together, but no more than 60 minutes or so.

Top with your favorite toppings and cook for 8-12 minutes.  Have fun and enjoy!


P.S, Kate (of Cookie + Kate, one of my favorite blogs, and one of the founders of The Food Matters Project) has been nominated for Best Cooking Blog in the Saveur Best Food Blog Awards of 2012! You should check her out and give her a vote if you have a moment!

Friday, March 23, 2012

Adios! Vamos a Cabo San Lucas!

image courtesy of google
See you next week....  We're heading to Cabo! 

Cabo is a place us East coasters have always wanted to get to.  I can't wait to sip margaritas, get some sun, scuba, and eat as many fish taco's as I can get my hands on!  Ohhh, and the guacamole, can't forget about that :)

Saturday, March 10, 2012

Dark Chocolate Clusters


Last week my girl friend and I realized both of our hard working husbands would be out of town for business at the same time.  We immediately decided just like 17 year old girls that we needed to have a sleepover.  When you grow up you're still allowed to do that, right?  So my puppy and I packed up our things and headed up to Lake Norman for a girls' night of deep conversation, yoga, puppy snuggling and dark chocolate.  It also helps when your girlfriend lives waterfront on a lake!   I swear, driving 20 minutes north, out of the city was like I went away on vacation.  Also waking up to a huge expansive body of water is extremely relaxing...
image courtesy of google

So to thank my friend for having us at her home, I decided to whip up these easy and healthy, yet delicious, dark chocolate clusters.  Dark chocolate is melted over omega-3 rich walnuts and dried cranberries.  I made each cluster to be about 1 inch in diameter, which I think worked perfect.  Our Lake Norman host loved them, you will too!


Ingredients

1 lb dark chocolate (70% Cocoa)
1 cup walnuts
1 cup dried cranberries

Method

If you have a double boiler, melt the chocolate in that.  If not, MacGyver one up by boiling water in a sauce pan with a glass bowl sitting on top of it.  Place the chocolate into the glass bowl until fully melted. 

Remove the glass bowl from the sauce pan and place on a heat resistance surface.  Add the walnuts and dried cranberries to the chocolate.  Stir together.  Spoon mixture onto a cookie sheet lined with wax paper.  Transfer the cookie sheet to the fridge and let them set for at least 30 minutes.  Package in a small metal container to gift someone, or just enjoy straight from the fridge!

Wednesday, November 16, 2011

Hot Apple Cider with Rum


As I mentioned in this post, two weeks ago my husband and I made a weekend trip to NYC to take in the sites, visit some friends and have a little fun.  We have a tradition that while visiting any big city, we try to take in the sights with a cocktail on the top of a the highest building we can find.  We first did this in Bangkok 3 years ago and it was such a memorable drink/view.  In New York, we weren't disappointed.
 
Chris and I had cocktails at at two different spots over the course of 5 days.  First we went to the top of the Gansevoort Hotel which provided a beautiful view and an interesting crowd.  But our favorite rooftop spot was at 230 Fifth.  This place was awesome.  It was huge, had no cover or exclusive VIP lists, great music and expansive views of midtown and the Empire State Building.  When you got off the elevator, you were handed a red fleece snuggie-like hooded blanket to help keep you warm in addition to their rooftop heaters.  When you looked around it was kind of like you were at some secret meeting of the red-robed cult.  But as someone who is always cold, I loved it!!!  What kept us really warm was the hot apple cider drinks with rum.  Since apple cider is prevelant in the markets now, I had to re-create this yummy and warming cocktail at home.


This would be a great drink to serve over Thanksgiving, because who doesn't need a little rum over the holiday?? :)


Ingredients

1 part dark rum (we used Sailor Jerry)
2 parts apple cider
1 orange, peeled and sliced
3-5 cinnamon sticks
1 handful of cloves

Method

In a medium sauce pan combine all of the ingredients and heat over low heat until warm.  Serve in a glass mug and garnish with additional orange slices and cinnamon!  (You also easily could substitute this cocktail with Bourbon or other dark liquor that you have on hand).

Follow me on Twitter @CheesePlease531

Thursday, October 27, 2011

Spaghetti Squash with Chicken, Lemon & Basil


It had been raining non-stop for several days in Charlotte, and I think I was wishing for sunshine the other day as this recipe uses a lot of yellow ingredients.  I think it worked, because after I started cooking, the sun came out!  (I swear).   Anyways, I hadn't made spaghetti squash in long time, and was craving it after picking up a pretty little yellow thing at the farmers market for under a dollar.  I wanted to pair it with something other than marinara sauce though.  So after surveying the kitchen and thinking sunny thoughts, I came up with this!

Spaghetti Squash can be a fun and healthy alternative to eating pasta.  In this dish chicken breast is thinly pounded out, breaded and then baked with lemon slices as the squash roasts.  The "spaghetti" and breaded chicken breast are tossed together and finished off with a zested lemon cream sauce topped with basil.  The cream sauce is made healthy by using chicken broth and a just two tablespoons of light cream.  Simple fresh chopped basil compliment the bright lemon flavor.


Ingredients
serves 4

1 medium squash
1 lb of chicken breast, evenly pounded out
1 cup of whole wheat bread crumbs
1 lemon
1 tablespoon butter
1/2 cup chicken stock
2 tbsp light cream
1/2 cup grated parmesan cheese
1/2 tsp minced garlic
1 bunch of basil leaves
salt and pepper to taste

Method

Pre heat oven to 375 degrees.  With a fork, poke a few holes into the squash and bake for 1 hour.  (Be careful not to overcook squash since it will become too soft and soggy.)  While the squash in baking, pound out each chicken breast to about 3/4" thick.  Dip each chicken breast into an egg white and cover with bread crumbs.  Cover each piece of chicken breast with slice of lemon and place in glass baking dish.  Bake for 30-35 minutes until cooked through.  Discard the lemons and slice into smaller pieces. 


Transfer the baked squash to a large plate and set aside until cool enough to handle.  Cut the squash in half lengthwise.  Remove seeds, and then using a fork, scrape squash out of rinds and transfer to a large bowl.

To make the sauce:  In 1 teaspoon of butter, saute 1/2 a teaspoon of garlic and lemon zest over medium heat.  Add 1/2 cup of chicken stock, the juice of half of  a lemon and cook for 2-3 minutes and then lower heat.  Add the light cream and parmesan cheese.  Let simmer for 5 minutes until sauce is blended and slightly thickened.

Serve chicken over the spaghetti squash and top with the lemon cream sauce.  Season with salt and pepper and top with fresh basil.  Enjoy!


Follow me on Twitter @CheesePlease531

Thursday, October 20, 2011

Kid Friendly and Healthy Peanut Butter Pie


This past week I made a few of these healthy Peanut Butter Pie's for an group that I am involved with called Kids In the Kitchen (KITK).  Kids in the Kitchen is sponsored by the Junior League of Charlotte and we provide lessons and demonstrations of healthy meals and snacks in partnership with local community organizations, chefs and nutritionists.  It has been a really fun opportunity to get involved, and has also been a great way to engage kids in the preparation of healthy meals to educate them and their parents regarding nutrition and healthy choices.

This week we worked with a local program that provides a series of workshops for parents of preschool aged children on health and wellness.  The goal was to introduce a healthy, yet affordable and tasty dessert.  The workshop went really well, and the parents loved the idea of how simple it was to make a healthy dessert!  (My cooking demonstration on the other hand... let's just say that I am definitely not the next FoodNetwork Star... I'll be leaving this job to Giada)

These healthy Peanut Butter Pies are not only extremely easy to make, it is extremely delicious for under 200 calories a slice.  I can't lie - this pie tastes like a Reese's Peanut Butter Cup. The chocolate graham cracker crust provides a cookie-like base for a whipped peanut butter filling.  Using natural peanut butter and light cool whip makes this healthier than the full fat versions.  This dessert recipe would be perfect for when your dinner party includes kids, or as an extra dessert for the holidays.

Ingredients
Serves 8

1 Chocolate Graham Cracker Pie Crust (pre-made and found at your local grocery store)
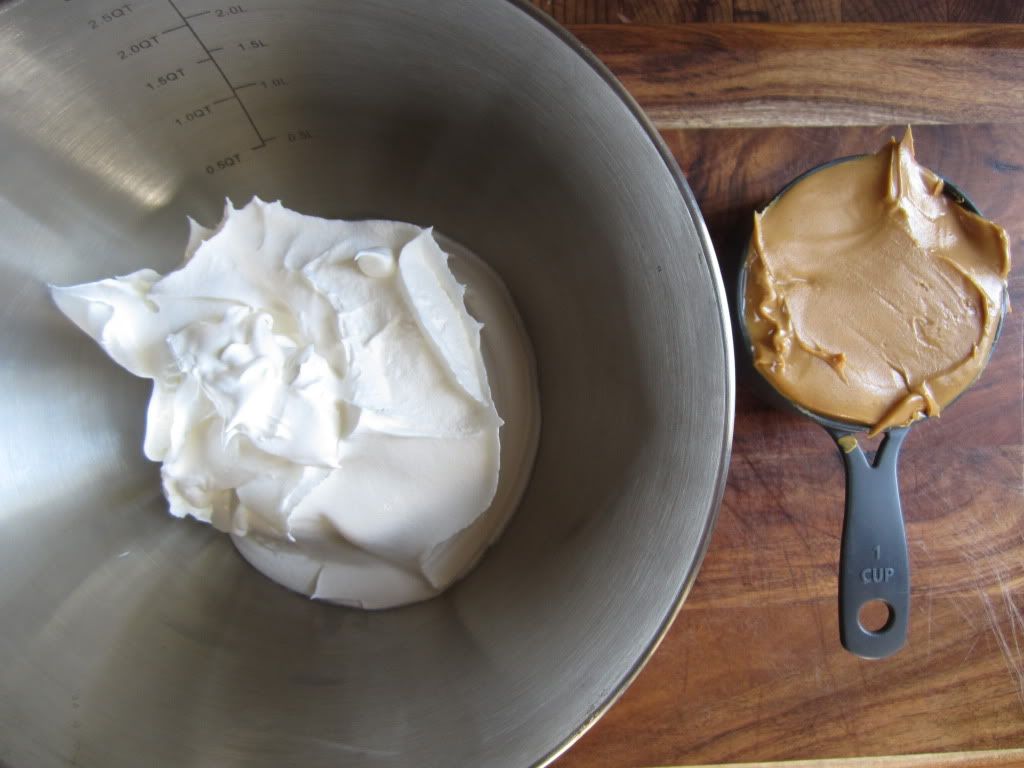
1 cup of Natural Peanut Butter (it is easiest to use the no-stir variety)
8 oz of Light Cool Whip
1 - 2 tbsp Sugar Free Chocolate Syrup for drizzling


Method

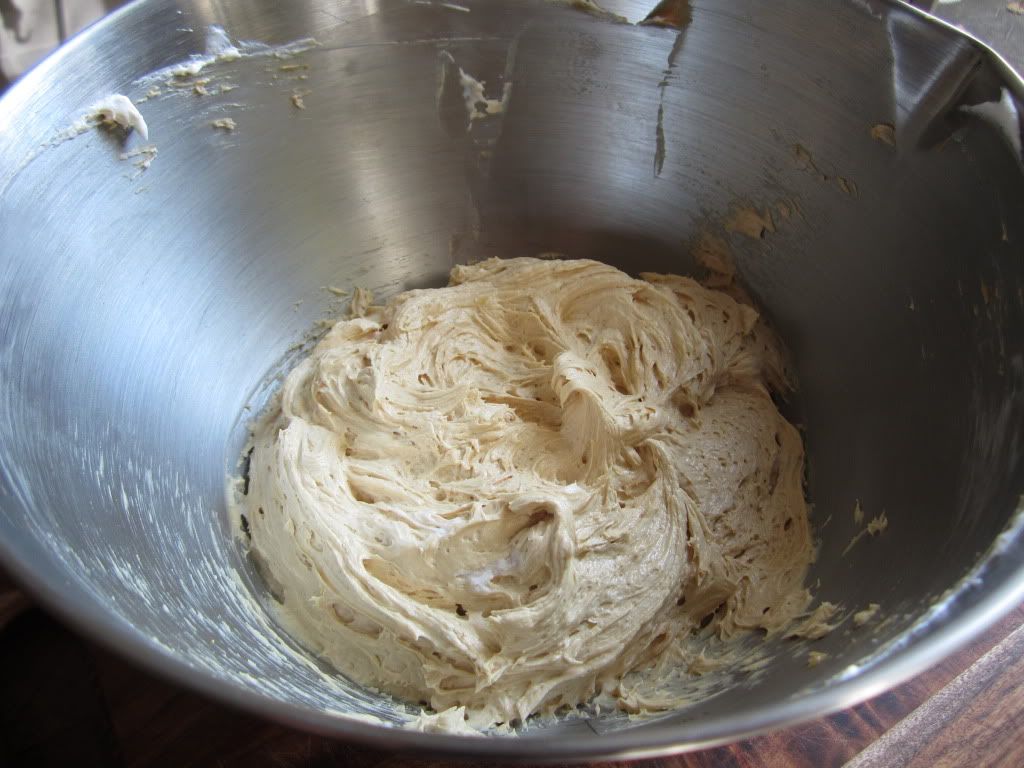
In a medium sized bowl, combine the peanut butter and cool whip.


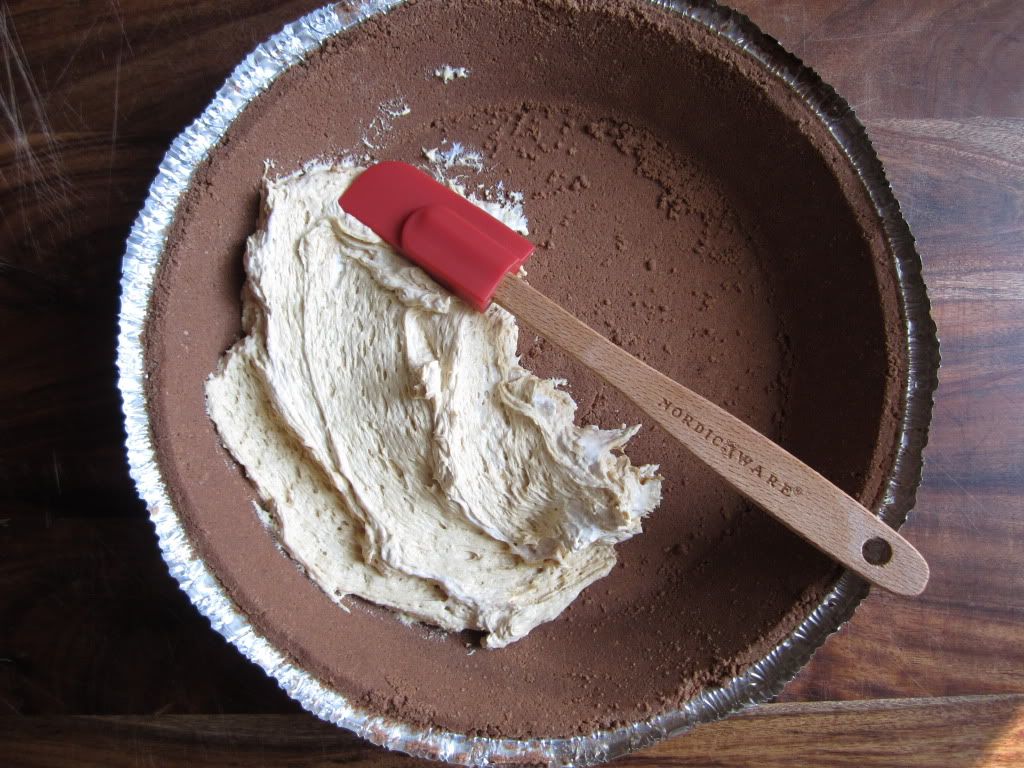
Carefully fill pie crust by adding a couple spoon fulls at a time.  Using a rubber spatula spread filling evenly on pie crust.


Freeze for at least 30 minutes.  Remove from freezer and top with syrup in any desired pattern.  Have fun and enjoy!

Sunday, October 16, 2011

Old Bay Grilled Chicken Wings


These are soooooooooo good, and perfect for watching football on a Sunday.  Chris and I, being from Maryland, practically grew up on Old Bay.  We have added it to many things, but when Chris threw some Old Bay on some chicken wings, my love for him grew even deeper.  Just kidding, but these are good, finger licking good as they say in the south.

I love the idea of grilling them because it is a much healthier alternative to frying them.  The key to grilling them is you have to watch how strong of a flame you are using.  The fat tends to drip down and cause flare ups as it liquifies.  


Even if you are not from Maryland you should still have a canister of Old Bay as one of your kitchen staples.  And then, when you are watching football and grilling on a beautiful fall day, throw some of it on your chicken wings and enjoy! 

Ingredients
serves 2

12 chicken wings
1/4 cup Old Bay seasoning

Method

Pre-heat grill.  Pat dry chicken wings with a paper towel.  Liberally cover wings with Old Bay.  Marinade the wings for at least 30 minutes.  Throw the wings on the grill at medium heat for 2 minutes on each side so skin gets crispy.  Reduce heat to low and grill for another 10-15 minutes. 


Follow me on Twitter @CheesePlease531

Tuesday, September 27, 2011

Easy Cheesy Dog Treats

The last few things I have made  have turned out only "ehhhh".  Not great, but not bad.  Except for a chicken dish that was pretty terrible.  Definitely not going to share any of those.  So to change things up I decided to make use of some staple kitchen ingredients and make my beloved puppy some new treats!  Like most dogs, he loves everything, so I thought these couldn't be too hard.

I guess I have to start out by saying that I have wanted a puppy for YEARS.  It was something that as soon as my husband and I started seriously dating, I seriously started talking about getting a dog.  You see, my Dad is allergic to dogs and cats, so growing up I envied my friends with four legged furry pets, and always envionsed that one day I would have a dog of my own.  My husband also didn't grow up with pets either... but he was much, much more apprehensive about the whole "getting a dog thing".

Four years later, I finally caught my husband in a weak moment backed up with lots of nerdy spreadsheets that contained research about different breeds and costs associated with owning a pup.  (Finance guys love spreadsheets).   But since we got our puppy our lives have dramatically changed for the better and we both agree that getting Charlie was the best thing we've ever done!


So why not make your dog his or her own special treats?  Of course any puppy of mine loooooves cheese.  (I actually wanted to name him Cheddar but was vetoed).  This recipe uses everything you already have in your pantry, and your puppy will love the treats!  I found a dog shaped cookie cutter while shopping for this recipe over the summer.


Ingredients
Source: Simply Yummy Goodness

1 cup whole wheat flour
1 cup all purpose flour, plus extra for rolling
1/4 cup corn meal
1/4 cup low-fat cheddar cheese (I used Kraft)
1/4 cup parmesan cheese, plus more for sprinkling
1 egg
3/4 cup water


Method

Preheat oven to 325 degrees.  In a large bowl stir together the whole wheat flour, all purpose flour, and corn meal.  Add in the cheddar and parmesan cheese.  Lastly add the egg and water.  Knead the dough until the ingredients are well combined.

Take half of the dough and place on a floured surface.  Roll out to a 1/4" thickness and use your favorite cookie cutter to make each treat.  Place on a sheet pan and bake until golden for 25-30 minutes.


I hope your dog loves these as much as ours does!  Nothing like spoiling your puppy silly... I mean he deserves it, right?

Follow me on Twitter @CheesePlease531

Wednesday, September 21, 2011

Lavender White Chocolate Oatmeal Cookies

Have you ever bought something that got you really, really, really excited and then realized amidst your personal celebration that no one else probably would ever be as excited as you are over your purchase?  Yes, that was me last weekend when I stumbled across culinary grade Lavender in World Market.  I was practically giddy with my fragrant spice find, and immediately starting planning out all possibilities and flavor combinations my new purchase could take me.   I also picked up some vanilla beans which doubled my excitement as I gleefully skipped to the cash register.  (More to come on that)


Lavender is a member of the large mint family, and therefore lends itself to savory dishes as well as sweet desserts. There are many possibilities because lavender is sweet with a citrus note.  Lavender is also known as a calming and relaxing herb.  I have two friends who I immediately thought a Lavender recipe would be perfect for.   Both of their lives are going to get quite busy in the next few weeks and I thought a little bit of Lavender with its tranquil qualities would be exactly what they needed! 


Ingredients

1/2 cup unsalted butter (8 tbsp or 1 stick)
1/2 cup brown sugar
2 tbsp dried culinary Lavender
1 large egg
2 1/4 tbsp skim milk
1 tsp vanilla extract
1 cup old fashion oatmeal
1.5 cups all purpose flour
3/4 tsp baking powder
1 cup white chocolate Ghirardelli chips (about half a package)

Method

Pre heat oven to 350 degrees.  In a medium bowl with a hand mixer blend butter, brown sugar and Lavender until smooth.  Then add the egg, skim milk and vanilla.

In another bowl mix oatmeal, flour and baking powder together.  Then add in the white chocolate.  Add all of these ingredients to the other bowl.

Mix both blends together until it forms a soft dough.  Spoon dough onto a greased cookie sheet about 1 inch apart.  Bake 10-14 minutes until lightly golden!


I hope these bring tranquility and relaxation to you, they did to me!  Follow me on Twitter @CheesePlease531 for general cheesy updates and tweets!

Tuesday, August 30, 2011

Shrimp Chorizo Burgers


Burgers are quintessential to the summer!  They are a great weeknight meal and of course, super popular for serving guests at cook outs.  Recently I was at the dentist browsing an old issue of Food & Wine magazine and there was an article about paella.  I love paella and while contemplating what to make for dinner last weekend, I couldn't get some of the paella's ingredients out of my mind!  When my husband requested that we cook up some burgers I had an idea!  What if I combined a few paella ingredients and incorporated them into a delicious burger?! 

This recipes recipe pairs two surf-in-turf ingredients who have known each other forever in a very friendly, delicious and perfect-for-cookouts way.   I decided to approach this burger concept kind of like how I build a crab cake and decided to chop up the shrimp and chorizo so it could be formed into a patty.  It worked out really well.  I baked these, but if you used a grill pan you could throw them on the grill too.  Make these spicy and sultry burgers at your next cook out!


Ingredients

Serves 4

1 lb of shrimp
1/2 lb of fresh chorizo (not smoked)
1 egg white
3 tbsp of mayonnaise
2 tbsp of diced white onions
1 tbsp of lemon juice (juice of half a lemon)
1/2 tsp of salt
1/4 tsp of pepper
3/4 cup of whole wheat bread crumbs
1 tbsp on garlic
1 tbsp extra virgin olive oil
4 kaiser rolls

Method

Preheat oven to 400 degrees.  On the stove top, heat olive oil in a saute pan over medium high heat.  Add garlic and saute for 2-3 minutes.  Remove shrimp from their shells and add to saute pan.  Reduce heat to medium and cook shrimp for 3-4 minutes on each side until shrimp is no longer opaque.   Remove from heat.

In a food processor, add shrimp and process for a few seconds until shrimp is chopped into small pieces.  If you don't have a food processor, chop cooked shrimp on a cutting board into small pieces.  Repeat for the chorizo!

In a medium sized bowl mix together bread crumbs, mayo, egg white, onions, and lemon juice.  Next lightly fold in chopped shrimp and chorizo.

Cover bowl and place in the refrigerator for no less than 30 minutes. It is important to refrigerate the mixture so the flavors marinate and also so you can easily form patties.

In a glass baking dish, form 4 burger patties and bake uncovered for 20 minutes. While the burgers are baking, lightly toast the rolls. Assemble burgers and garnish with tomato, arugula and lemon!


Follow me on Twitter @CheesePlease531

Monday, August 15, 2011

Chocolate Toffee Shortbread Bars

Have you ever been invited over to a friend's /co-worker's/ family member's home for dinner, and asked to bring a dessert?  For some, panic might set in, what do I bring?  Do I make something?  Bring something store bought? Is store bought tacky?  I believe one should never show up empty handed, and these types of questions always flood my mind.  I can't help it!  Dessert options are endless, and most of us don't routinely make dessert, but this recipe is one that is easy and will wow any crowd of diners.   The bars can be made a few days ahead of time and easily stored in the refrigerator. 


These Chocolate Toffee Short Bread Bars are a fun twist on the average cookie, and way more exciting than brownies!   The buttery chocolate-infused shortbread is deliciously topped with creamy chocolate and studded with sweet-and-salty caramel toffee bites.  I dare you to just eat one!

Ingredients

Makes about 30 bars
Recipe adapted from Annie's Eats

For the Shortbread base:
1 1/2 cups all purpose flour
1/2 tsp salt
1/4 tsp cinnamon
2 sticks unsalted butter at room tempature
1/2 cup brown sugar, packed
1/4 cup granulated sugar
1 tsp vanilla extract
3 oz bittersweet or semisweet chocolate chips, or finely chopped chocolate (I think the key is to use good chocolate, I prefer Ghirardelli)

For the topping:
6 oz bittersweet or semisweet chocolate chips, or finely chopped chocolate
1 1/2 cups toffee bits


Method

Pre-heat the oven to 375 degrees.  Line a 9 x 13 baking dish with foil and spray with baking spray.  (My mom turned me on to Pillsbury's Baking Spray with Flour and highly recommend it).

In a small bowl combine flour, salt and cinnamon, set aside.

With an electric mixer begin to mix butter while slowly adding brown and granulated sugar.  Beat on medium high until the mixture is light and fluffy.  About 3 minutes. 

At a slow speed, blend in the vanilla.  Then slowly blend in the small bowl dry ingredients.  (You need to add these slowly or cover the top of the mixer with a kitchen towel to avoid flour flying all over the place).  Stir in chocolate until it is evenly distributed.

Transfer the dough to the 9 x 13 pan and press into an even layer.  Bake the crust for 18-20 minutes or until shortbread is bubbling.

Remove the pan from the oven and transfer the hot dish to sit on a wire rack.  Sprinkle 6 oz of the chocolate evenly over top of the shortbread base.

Cover the pan with foil and let sit for 5 minutes.  Remove foil and spread the melted chocolate over the crust into a thin later using the back of a spoon or rubber spatula.  Immediately sprinkle toffee bits over the melted chocolate and press down. 

Let cool to room temperature.  If the chocolate is not set by the time the bars are cool, pop the entire thing into the freezer for ten minutes.  (I threw mine into the fridge, went to a yoga class, and when I got back they were set).  Using the long edges of the foil as handles, lift the bars out of the pan and with a sharp knife cut into small pieces.  Enjoy!


Thanks to my husband's wonderful family who gave me nothing but positive feedback on my recipes this past weekend!  Also, thanks and kindness to my wonderful friend Whitney who let me borrow her Kitchen Aid Mixer to see if I should invest in one.  I am glad someone got to use the mixer in the last two years!! ;)  I loved using it, and I must have one now!!!!  I foresee more baking in my future as my sweet tooth seems to grow sweeter every day.......

Follow me on Twitter @CheesePlease531