Showing posts with label Appetizer. Show all posts

Monday, April 30, 2012

Asparagus and Dandelion Soup


So this week it's supposed to be hot here in Charlotte, high's in the upper 80's, and full blown sunshine.  I guess this is "spring" in the south, or spring started at the end of February... I'm definitely not complaining! Either way we're still getting used to the warm temps living here.   So why soup, you ask?  Because, honestly, I get chilly in the air conditioning (pathetic, I know), and more likely I need to detox after the weekend :) 

My Mom and Dad came to visit so we showed them some good southern hospitality and eats.  Early Sunday morning Chris fired up the smoker and by the afternoon we had mouth-watering pulled pork, brisket, and racks of baby back ribs.  It was delicious.  In addition to all that I made a strawberry, mango and goat cheese spinach salad, and tried out this recipe for mac-n-cheese.  We also celebrated my Dad's birthday, so I proudly made my first salted nutella tart.  Everything was slowly savored and we were fat and happy by day's end.  So today, you can see I REALLY needed some detoxing slimming asparagus.  And when I need to detox from a weekend of indulgence, I always turn to soup.


This soup yells spring not only because of the asparagus, but I love the addition of dandelion greens.  They have a pleasant bitter flavor that tastes great sauteed or in a soup.  Dandelion greens are another great leafy green to experiment with, I encourage you to give them a try.  Sweet potato, spring onions, white beans and a parmesan rind provide a complex flavor that is not only delicious, but healthy :)  The recipe is adapted from Mark Bittman and part of The Food Matters Project.  For the orginal recipe visit Adrienneats, and for what other food bloggers did, check out The Food Matters Project.

Ingredients

1/2 cup White beans
1/2 a medium sweet potato, diced (I left the skins on)
1/2 lb asparagus, sliced into 2" pieces
2 cups dandelion greens, leaves removed from stems
1 tsp garlic
1 tbsp extra virgin olive oil
1 Parmesan rind
4 cups fat free chicken broth
1 cup water
2 stalks of spring onion

Method

In a large soup pot, heat olive oil and saute garlic for 1-2 minutes.  Add chicken broth, white bean, sweet potato, asparagus, dandelion greens and parmesan (pretty much the rest of the ingredients).  Bring to a boil, and then reduce heat and simmer for 20-30 minutes until potatoes are tender.  Top with extra parmesan and enjoy!

Sunday, April 22, 2012

Rosemary Asiago Cheese Bread {Whole Wheat}


Why would anyone want to bake their own bread?  That's crazy.  People who bake their own bread are weird I used to say.  Mind you, I am not a baker - at all.  I don't consider myself skilled in cakes, pies or pastries.  Now, after discovering how easy it is to make my own pizza dough, I felt courageous enough to give a loaf a bread a shot.  So fun!  And I was delighted to find it also pretty easy.  This bread is dense, yet full of flavor.  I love the idea of being able to control exactly what goes into your bread, no preservatives, or crazy unrecognizable ingredients.

This week, I was encouraged to give baking bread a shot by the Food Matters Project.  I love, love, love being a part of such a food conscious, healthy yet creative group of food bloggers.  For those unfamiliar, every week a fellow blogger chooses a recipe from Mark Bittman's Food Matters Cookbook, and over 40 bloggers take to their kitchens to create recipes inspired by that week's selection.


Real Whole Wheat Bread was this week's recipe chosen by Melissa of The Faux Martha.  When I'm at Whole Foods, I sometimes can't resist picking up a fancy loaf of bread with cheese in it.  So of course my take on the recipe involves cheese!  Fresh rosemary is also a obsession of mine.  So good!

Ingredients

3 cups whole wheat flour
1/2 tsp active yeast
2 cups freshly grated asiago cheese, 1/2 cup reserved
1 tsp of fresh rosemary
1/2 tsp Italian seasoning
1/2 tsp extra virgin olive oil
1/2 tsp salt
1 3/4 cup water

Method

In a large mixing bowl, mix together flour, yeast, salt, rosemary, Italian seasoning and 1 1/2 cups asiago cheese.  Add 1 3/4 cups water (I used room temperature water) and stir until blended. The dough should be wet and sticky, but not liquid.  Cover with plastic wrap and let sit on your counter for 18 - 24 hours.  Try to give it the full 24 hours for the best taste!

Grease a metal baking sheet pan with olive oil.  Place the dough on the sheet.  With a sharp knife, gently cut a large X into the top of the dough.  Brush the dough with the remaining oil and sprinkle with reserved asiago cheese, use from 1/4 to 1/2 cup.  {I won't judge you if you use a full 1/2 cup, go ahead, do it!}  Top with extra rosemary.  Cover with a towel and let the dough rise again for about an hour or two.

Preheat the oven to 350 degrees. Bake the bread for about 45 minutes until it is golden and sounds hollow when you tap on it. Immediately place bread onto a cooling rack and let it cool before slicing.  This tastes amazing on its own, with a little bit olive oil, or with some hot soup! Enjoy!

Friday, April 20, 2012

Roasted Maple Cinnamon Almonds


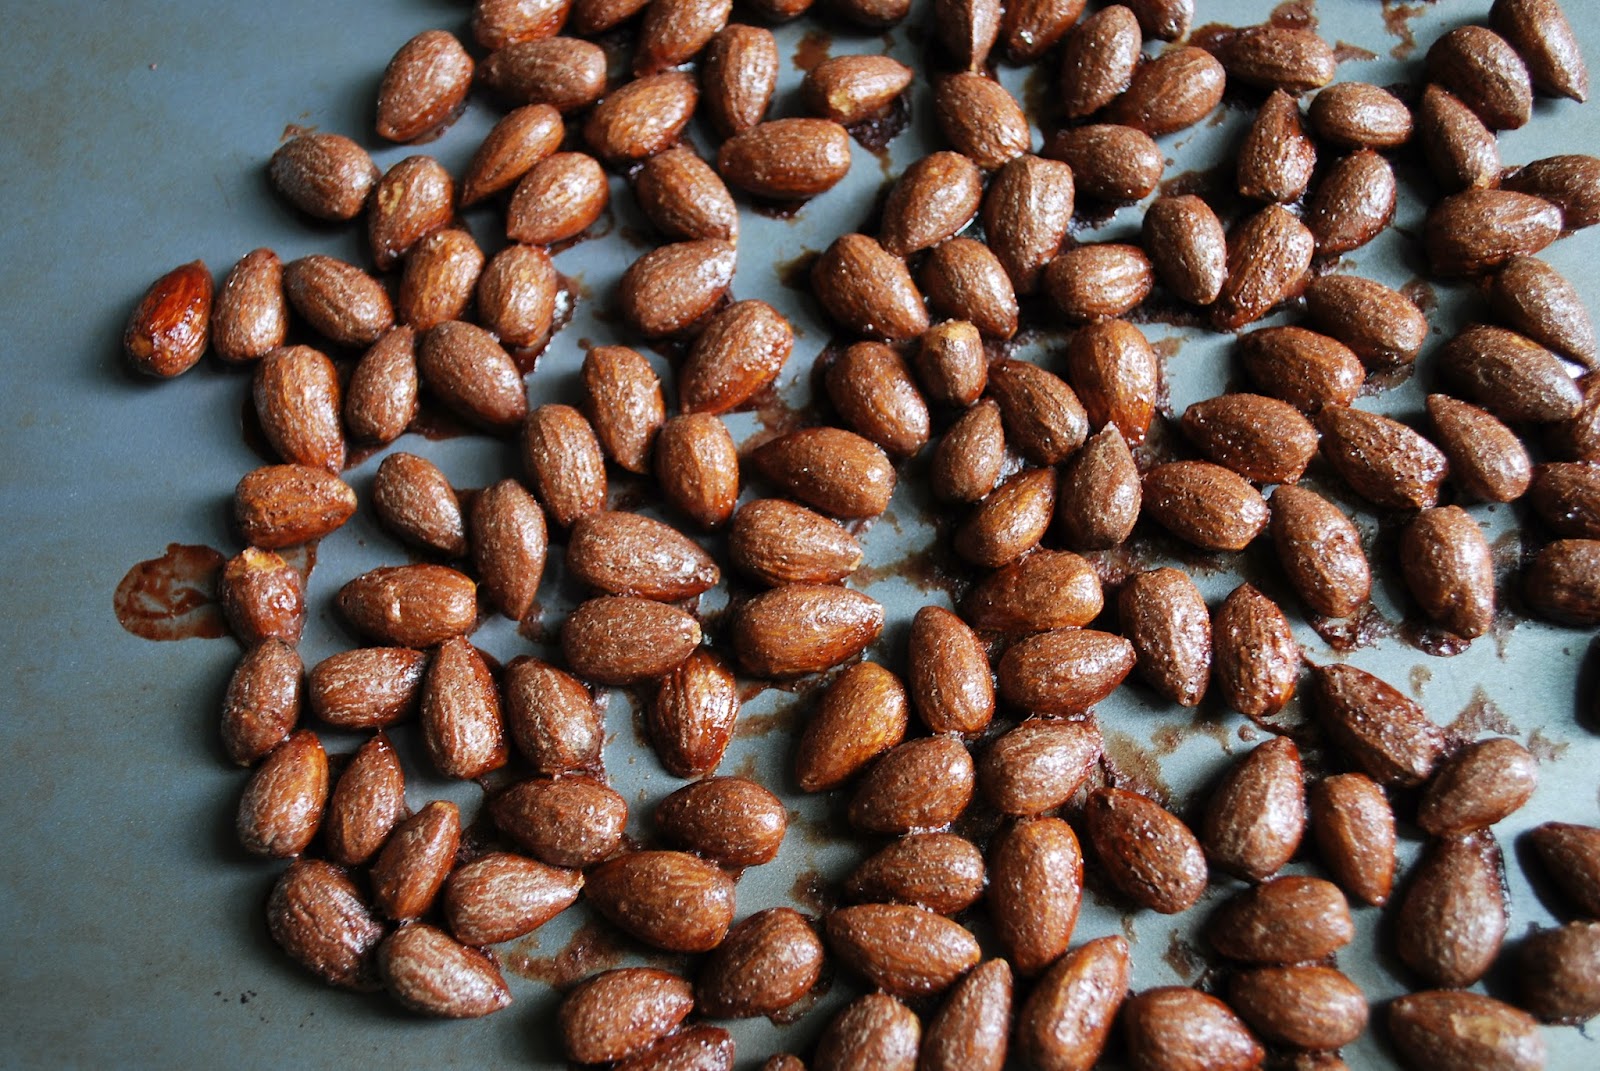
Lately I have had all these things I "need-to-do" floating around in my brain.  They are starting to build up.  Things like, buy batteries, groom puppy, clean out closet, plant basil plant... try making my own spiced almonds.  Nothing earth shattering.  But things I really want to do, things that I have been putting off for days, weeks!  Last night hopped up on vanilla iced coffee, I decided to take action and just do.  I accomplished all of the above, including homemade maple cinnamon almonds!!  It felt so good to commit an evening to just knocking things off my list.  My brain thanked me today, I slept better last night, and now I have a yummy snack for the weekend :)


Almonds are really good for you.  We all know that, so I try to always keep some around.  Regular almonds are okay on their own, but I have learned they taste wayyyy better when you add a few healthy natural toppings.  The first batch I tried I coated the almonds with just cinnamon and baked.  Not so good.  The second attempt, I added an egg white to the cinnamon and baked.  Not so good either.  Still hopped up on caffeine, I made a third attempt.  This time I mixed pure all-natural maple syrup {maple makes everything more exciting} with cinnamon, coated the almonds and baked.  These turned out sooo good.  I recommend you try these out!

 Ingredients

1 cup unsalted almonds
1 1/2 tbsp pure all natural maple syrup {don't use Aunt Jemina!}
1/2 tsp of ground cinnamon
a pinch of salt


Method

Preheat oven to 300 degrees.  In a small bowl, combine the maple syrup, cinnamon and pinch of salt with a fork/whisk.  Add almonds and coat them evenly.  Spread out almonds on a non-stick baking sheet and bake for 25 minutes, stirring every ten minutes.  Remove from oven and let cool.  Store these in an airtight container/plastic bag for a healthy portable snack!  Enjoy!


And just for kicks, here is a picture of Charlie Bear, groomed :)

Monday, March 12, 2012

Blood Orange Hummus


Over the weekend I was taking my puppy for a walk around the neighborhood, and was deep in thought of what to do with a couple blood oranges I picked up from the market.  I think about recipes most of the time I am walking the pup...  It's so nice to slow down for 30 minutes a day and enjoy being outdoors with an open mind.  I swear other than the unconditional love and cuddles, it is one of the best reasons to have a dog!  Anyways, as you know, blood oranges are only in season for a very short time of the year.  If you happen to see them, buy em quick!  For some reason this makes them extra luxurious in my mind... a rare gem of citrus fruits?  Maybe not, but I did want to do something special.

It was on this walk I decided to try to create a blood orange hummus.  I am a enormous fan of hummus, and knew that a basic recipe mostly always calls for lemon juice.  So why not replace blood oranges with lemons?  I was so delightfully surprised with the result.  I didn't have any tahini on hand, but I don't think it's essential with this particular take on tahini-free hummus.  I also added cumin, ground ginger, and little bit of tumeric for the pretty orange coloring and the health benefits.   The result was a union of spices that loudly comes together and complements the tangy blood orange juice.  This hummus is exciting, full of flavor and oh-so lovely.


The recipe was inspired by this week's selection for the Food Matters Project, which adapts recipes from the the Food Matters Cookbook.  This week's post is hosted by Erin from "Naturally Ella".  Check out with other bloggers did with Mark Bittman's "Hummus Served Hot" recipe here

Blood Orange Hummus

Ingredients

2 cup chick peas, rinsed
2 cloves of garlic
1/4 cup extra virgin olive oil
1/2 teaspoon of cumin, 
1/4 tsp turmeric
1/8 tsp ginger and paprika
salt and pepper
1 blood orange (about 1/3 cup juice)

From clockwise: paprika, cumin, tumeric and dried ginger
Method

For blood orange juice: roll orange with palm of your hand on a cutting board "loosing" the juices.  With a sharp knife cut the orange in half.  With both hands squeeze each half to release juice from pulp.  Be careful, the juice is blood red and can stain a porous wood cutting board (as I learned!).  Discard orange halves.  You should be left with about 1/3 cup of juice.  Set aside.

With a food processor, add chick peas, garlic cloves, spices and extra virgin olive oil.  Lastly add your blood orange juice.  Process until you have a smooth consistency.  Garnish with chick peas, paprika and a slice of blood orange.  Enjoy!


Friday, February 10, 2012

White Bean Basil Dip with Whole Wheat Rosemary Flatbread


I once spent a weekend at a friends house who served a white bean pesto dip during happy hour.  I had never had such a dip and instantly fell in love.  When I find a dip that isn't mayonnaise or sour cream based, I get pretty excited.  I despise mayonnaise.   Anyone else out there feel that way?  Yuck. There is something about it, the taste, texture, that will never win me over.  And since it isn't the best for you, I'm not upset.  Alright, enough mayonnaise hate...  I am however a huge fan of white beans, I tend to use them a lot.  They are especially good in a dip!  Add some fresh basil.... and you are at amazing, without any mayonnaise.

I wanted something to dip into this dip with (does that makes sense?), but didn't feel like going to the store last Sunday.  So I decided to whip up some easy flatbread.  I used white whole wheat flour to keep things a healthy as I knew chances were this, and many a glass of Louis Latour's Macon Villages Chameroy (a DIVINE french wine that isn't too expensive) would probably be my dinner.  The secret tastiness is adding chopped rosemary into the the dough. 


Ingredients

White Bean Basil Dip

1 can of white beans
1 cup of fresh basil, rinsed
1 tbsp of extra virgin olive oil
salt and pepper to taste

Rosemary Flatbread
source: Gourmet Magazine 
  
1 3/4 cups unbleached all-purpose flour 
1 tbsp chopped rosemary 
1 tsp baking powder 
3/4 tsp salt 
1/2 cup water 
1/3 cup olive oil plus more for brushing 
Sea salt

Method

For the dip, add beans to a food processor, process until the consistency of hummus.  Add fresh basil, olive oil and a pinch of salt and pepper.  Process until smooth.

For the flatbread.  Preheat oven to 450°F with a heavy baking sheet on rack in middle.  In a mixing bowl, stir together flour, chopped rosemary, baking powder, and salt.  Make a well in center, then add water and oil and gradually stir into flour with a wooden spoon until a dough forms. Knead dough gently on a work surface 4 or 5 times.

Divide dough into 3 pieces and roll out 1 piece (keep remaining pieces covered with plastic wrap) on a sheet of parchment paper into a 10-inch round (shape can be rustic; dough should be thin).


Lightly brush top with additional oil and a few pinches of sea salt. Place parchment on preheated baking sheet and bake for 8 to 10 minutes. Transfer flatbread (discard parchment) to a rack to cool, then make 2 more rounds (1 at a time) on fresh parchment (do not oil or salt until just before baking). Break into pieces and enjoy with the white bean and fresh basil dip! 

P.S. The white bean basil dip tastes amazing on a sandwich or wrap the next day for lunch.  Just sayin!  Enjoy! :)

Tuesday, January 31, 2012

Rainbow Salad


It looks pretty, doesn't it?

Last week I was with the group I volunteer with, Kids in the Kitchen, and we were talking to a group of adorable little girls about healthy eating choices.  We went over where food comes from, what foods to eat, and why you choose those certain foods.  We taught them that when they are choosing which foods to eat, try to eat the rainbow.  Little girls love rainbows, so this concept went over fairly well :)  For their activity and snack, we helped them make rainbow skewers.  Such a cute idea, and the kids really got into it.

image via pinterest
So the other day when I was trying to decide what to make for lunch, I was inspired by the rainbow skewers and created my version of them via a salad.  In this anti-oxidant rich salad, citrus oranges are complimented by sweet strawberries and slightly tart blackberries.  I added a little bit of walnuts to give the salad an extra crunch.  Delicious, simple and so good for you.  As we taught the group of kids, try to "eat the rainbow" next time you are making a salad!!

Ingredients
serves 2

1 naval orange, peeled and pulled apart
1/2 cup blackberries
1/2 cup sliced strawberries
1/4 cup of walnuts
2 cups of baby spinach

Method

Combine all ingredients in a large bowl and toss with your favorite light dressing!  Enjoy!


Follow me on Twitter and Facebook!

Sunday, December 18, 2011

Browned Butter Sage Cashews

Cashews........ Mmmmmmmmm........

There is something about these nuts that stand out from the rest.  They are not as hard as other nuts and feel luxurious to me.  Cover them in butter and I'm in heaven. 

So do yourself and favor and make these!  Browned butter gives the cashews a complimentary nutty flavor that is enhanced with sage, sea salt and little bit of honey.  These would make an excellent gift, and are sure to be popular next time you are entertaining! 


Ingredients
recipe adapted from The Kitchn

1/2 pound roasted, unsalted cashews
1 tablespoon unsalted butter
2 teaspoons finely chopped fresh sage
1/2 teaspoon honey
1/4 to 1/2 teaspoon salt

Method

Preheat oven to 350° degrees. Spread the cashews on a cookie sheet and warm in the oven.

In a small skillet, melt the butter over medium heat. Continue cooking for 2 to 3 minutes, stirring, until the butter begins to turn golden brown. Add the sage and cook, stirring, for another 1 to 2 minutes, until the butter is dark golden and the sage is frizzled but not burnt. Remove from heat and add the honey.

Toss the cashews with the butter mixture and add salt to taste.  Enjoy!  These also go extremely well with a Cabernet Sauvignon... just saying! :)

Follow me on Twitter @CheesePlease531

Monday, December 5, 2011

Roasted Butternut Squash, Ricotta and Fried Sage Crostinis


This is such a great appetizer for entertaining in the Fall. I recently bought a few butternut squashs and wanted to do something fun with them.  At first your standard soup came into my mind but then I had the idea of an autumn themed bruschetta.  Bingo! To be honest, I have weakness for bite size food... I can't help it. I just love small pieces that pack a lot of flavor in just one bite.  The additional benefit of having a fondness for bite sized food is that when entertaining you never freak out over what to serve with cocktails or as an appetizer!  Bite size food/crostinis are simply a win-win.

These butternut squash crostinis are served with a ricotta and lemon zest spread.  The ricotta compliments the squash and gives it a soft fluffy cheesy bed to rest on.  Sage was an obvious choice as it goes hand-in-hand with butternut squash.  But I upped this classic pairing by lightly frying fresh sage in olive oil for a minute.   It's a definite must-do and worth the few extra calories :)  These crostini's can easily be prepped ahead of time and assembled as company arrives. 


Ingredients

1 2 lb butternut squash
5 1/2 tbsp extra virgin olive oil, divided plus more for drizzling
1 tbsp brown sugar
freshly ground sea salt & pepper
24 fresh sage leaves
1 cup part skim ricotta
1 tsp finely grated lemon zest
1 whole wheat baguette, sliced
1 garlic clove
fresh lemon juice

Method

Preheat oven to 425 degrees.  Clean, peel and dice squash into small pieces.  Toss squash with 2 tablespoons oil and sugar on a rimmed baking sheet. Season with salt and pepper. Arrange in a single layer. Roast, tossing occasionally until squash is golden & tender, 23-30 minutes. Let cool on sheet.

Heat 1 1/2 tablespoons oil in a small skillet over medium-high heat. Add sage; cook until edges begin to curl and turn dark green, 1-2 minutes. Using a slotted spoon, carefully transfer fried leaves to a paper towel to drain. Mix ricotta and lemon zest in a small bowl. Season with salt & pepper.

Slice baguette into 1 cm pieces and place on a baking sheet.  Drizzle lightly with olive oil and season with salt and pepper.  Bake for 6-7 minutes or until lightly toasted.  Remove from oven.

To assemble crostini, top each piece with the ricotta mixture and then layer with a spoonful of squash. Drizzle crostini with lemon juice and olive oil. Sprinkle with salt & pepper. Top crostini with a fried sage leave and enjoy!


Follow me on Twitter @CheesePlease531

Saturday, November 12, 2011

Grana Padano and Fig Appetizer


Last weekend Chris and I made an impromptu decision to fly up to New York for a weekend of fun at the very last minute.  It was crazy - I literally woke up Thursday morning with an early yoga class in mind, and after a phone call from my husband, four hours later, I had purchased a plane ticket and was waiting to board an airplane.  It was probably the most spontaneous thing we have ever done.  In the past 5 years Chris and I having traveled all over the world together but we had never been to the Big Apple together.  One of the places we visited was Murray's Cheese Shop in Greenwich village.  This place is AMAZING.  I was like a deer caught in head lights trying to take in all the beautiful displays and varieties of cheese.  Cheese Heaven!!!


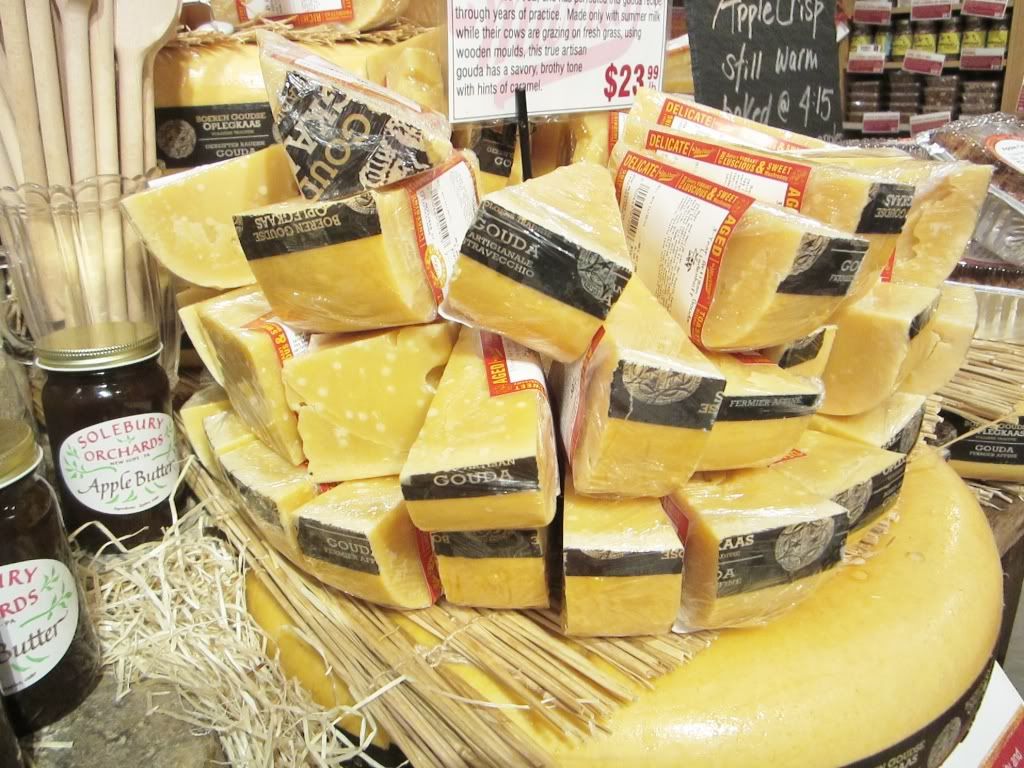
We ended up buying an incredible cheese that we sampled called Grana Padano.  This cheese is less nutty and salty, a much more delicate cheese compared to your regular Parmesan.  Think of Grana Padana as Parmigiano Reggiano's high-maintenance cousin.   We learned that it is made throughout the Po River Vally in northeastern Italy, and the cheese requires the raw cow milk of two milkings, which is then partially skimmed, cooked twice and bathed in brine before aging.  Serious stuff.  Grana means "grain" noting the cheese's fine, flaky, granular quality and sweet, nutty bite.  Murray's insists upon a 20 month age, and such high standards call for a worthy wine.*


So if you are in need a new appetizer for thanksgiving, or entertaining this holiday season?  I highly recommend you serve these simple and rustic cheese hors d'oeuvres.  Any type of Parmesan goes wonderfully with a high quality fig spread or preserve.  The fig spread is rich and sweet and pairs well with the nutty cheese.  I used Dalmatia's Fig Spread which I found in the gourmet section of my local grocery store.

Ingredients

1 whole wheat batard
1 jar of fig spread or fig preserves
1 block of good quality parmesan cheese
1 tablespoon of extra virgin olive oil
salt and freshly ground pepper to taste

Method

Line a small baking sheet with foil.  Cut batard into 1cm thick pieces and evenly spread out on baking sheet.  With a pastry brush or an olive oil mister, add a little bit of EVOO on each piece of bread.  Season with salt and pepper and toast in a toaster oven or on in the broil until golden brown.  Remove from oven.  Top with a a little bit of fig spread and cheese.  Enjoy!


*source: Murray's Cheese Shop

Tuesday, October 25, 2011

Zucchini Parmesan Crisps


These zucchini parmesan crisps are one of my favorite ways to eat zucchini.  In fact, coating them with parmesan cheese and "oven frying" them actually makes them taste nothing like a vegetable.  Sound fabulous?  They are.  They also make me ponder what else can I cover with cheese and bake.... 

For the breading, I used a slice of whole wheat bread that I crumbled in my food processor.  But store bought bread crumbs or panko bread crumbs would also work.  Next time I think I would like to add some pepper jack cheese to give them a little bit of kick.   I served these hot straight from the oven as an appetizer, but you also could serve them with a marinara or ranch dipping sauce.  Either way, you can't go wrong.


Ingredients
Adapted from Ellie Krieger

2 medium zucchini (about 1 pound total)
1 tablespoon olive oil
1/4 cup freshly grated Parmesan
1/4 cup whole wheat bread crumbs
1/8 teaspoon salt
Freshly ground black pepper

Method


Preheat the oven to 400 degrees. Coat a baking sheet with cooking spray.  Slice the zucchini into 1/4-inch thick rounds.  In a medium bowl, toss the zucchini with the oil. In a small bowl, combine the Parmesan, bread crumbs, salt, and a few turns of pepper. Dip each round into the parmesan mixture, coating it evenly on both sides, pressing the coating on to stick, and place in a single layer on the prepared baking sheet.


Bake the zucchini rounds until browned and crisp, 25 to 30 minutes. Remove with spatula and serve immediately!

Follow me on Twitter @CheesePlease531

Sunday, October 16, 2011

Old Bay Grilled Chicken Wings


These are soooooooooo good, and perfect for watching football on a Sunday.  Chris and I, being from Maryland, practically grew up on Old Bay.  We have added it to many things, but when Chris threw some Old Bay on some chicken wings, my love for him grew even deeper.  Just kidding, but these are good, finger licking good as they say in the south.

I love the idea of grilling them because it is a much healthier alternative to frying them.  The key to grilling them is you have to watch how strong of a flame you are using.  The fat tends to drip down and cause flare ups as it liquifies.  


Even if you are not from Maryland you should still have a canister of Old Bay as one of your kitchen staples.  And then, when you are watching football and grilling on a beautiful fall day, throw some of it on your chicken wings and enjoy! 

Ingredients
serves 2

12 chicken wings
1/4 cup Old Bay seasoning

Method

Pre-heat grill.  Pat dry chicken wings with a paper towel.  Liberally cover wings with Old Bay.  Marinade the wings for at least 30 minutes.  Throw the wings on the grill at medium heat for 2 minutes on each side so skin gets crispy.  Reduce heat to low and grill for another 10-15 minutes. 


Follow me on Twitter @CheesePlease531