Thursday, August 11, 2011

Almond Crusted Chicken with a Strawberry Balsamic Sauce

Almonds have to be one of the easiest snacks you can have to satisfy hunger in a pinch.  They are loaded with good fats that keep you full longer and bursting with vitamin E, an antioxidant that bolsters the immune system.  We always have almonds around the house.  Last week Chris went to Costco and bought them in bulk.  He also bought several pounds of chicken breast and strawberries.  I threw together all of these ingredients and ended up with a surprisingly wonderful dinner!


The combination of the crunchy almond crust combined with a savory strawberry sauce is definitely a winner.  The hint of balsamic vinegar adds a nice extra layer of flavor.

Ingredients

Serves 4

4 Boneless Skinless Chicken Breasts
1/2 cup of Almonds
1 Egg White
1 cup of Fresh Strawberries, rinsed and stems removed
1 tbsp of Sugar
1 tbsp of Balsamic Vinegar
1 tbsp of Corn Starch
1/8 cup of Chicken Broth (potentially more if sauce requires)
1 tbsp of Fresh Rosemary finely chopped (2 sprigs of fresh rosemary)

Method

Preheat the over to 350.  In a food processor, process almonds for 1-2 minutes to a chunky bread crumb consistency.  Set aside.

Lightly pound chicken breast into 1/2" - 1" pieces.  The easiest way to do this is to cover the chicken breast with saran wrap using the smooth side of a kitchen mallet.

Dip chicken into a bowl containing the egg white, followed by dipping the chicken into the almond mixture.  Coat each chicken breast with almond crumbs on each side.  Place is a glass baking dish. Cover and bake for 30-35 minutes until chicken is browned and tender.

For the strawberry sauce, combine the strawberries, sugar, and balsamic in a food processor.  Place strawberry mixture in a stove top pan and add chicken broth, cornstarch and rosemary.  Bring to a low boil and then reduce heat.  Simmer for 5 minutes.

Top tender chicken breasts with the strawberry balsamic sauce and garnish with extra fresh rosemary.  Bon Appetit!

Follow me on Twitter @CheesePlease531 !!

Monday, August 8, 2011

Happy Hummus

If there is one thing in this world I am absolutely crazy for other than cheese, it is hummus.  Hummus is a wonderful, healthy, and tasty snack option that can be used in so many ways.  I started buying hummus a few years ago, and you could always find me every evening after work standing in my kitchen dipping whatever I could find into a container of hummus.  I would be starving and could never stop myself from diving into some hummus before I cooked dinner.   When I started consuming containers of Sabra hummus faster than I care to remember, I decided to look into how to make it myself.

Turns out hummus not only is extremely easy to make, you can make it at a fraction of the cost!  And there are so many different ingredients you can add to change up the flavor.  Through out the past few years I have become addicted to making my own.   I like my hummus to be somewhat simple.  I also like it to be loaded with garlic, so feel free to use less, or even add more.  The secret ingredient lies in the ground cumin seeds, definitely don't leave it out.  This recipe is my favorite, it is the result of countless tries of many different ingredient combinations.  I think you will love it! 


Ingredients

1 can of chick peas, drained (aka garbanzo beans)
2 tbsp minced garlic (feel free to use 3 tbsp is you love garlic)
1/2 tsp ground cumin
2 tbsp organic sesame tahini  
1 tbsp lemon juice
2 tbsp extra virgin olive oil
1/4 cup water
1/2 tsp freshly ground sea salt
1/8 tsp paprika

Method

Combine all ingredients in a food processor and process for 2-3 minutes.  Place in a small container and refrigerate for 3-4 hours.  Top with sprinkled paprika and serve with your favorite veggies (mine are cucumbers!) or pita chips.


It is always a great idea to whip up a batch at the beginning of the week to have on hand for sandwich spreads, or when you need a low-calorie snack!

Follow me on Twitter @CheesePlease531

Thursday, August 4, 2011

Yellowfin Tuna with Fresh Pineapple Salsa


This light and delightful meal was inspired by a trip to Key Largo last November.  We traveled down to Florida for a few days of warm weather and scuba diving.  The florida key's are a great little spot to get some sun and relax right before the holidays ramp up.  This past weekend we were reminiscing about the trip and all the good meals we had.  There is nothing in the world like fresh seafood!   One particular meal that stood out in my memory was a grilled tuna topped with fresh pineapple salsa… So delicious!


Yellow fin tuna is a tender yet mild fish that makes is great for grilling and eating a tad bit rare.  For the finest taste, look for sashimi grade tuna, also known as ahi tuna.  


Fresh cut pineapple is by far tastier than the canned variety.  Pineapple salsa is absolutely delicious and can be used for many other things too!  It will keep for 1-2 days, as long as it is covered and in the fridge.  Make a little extra and serve with tortilla chips as snack :)


Fresh Pineapple Salsa

 
2 cups of freshly diced pineapple
1/2 cup of chopped cilantro
1/4 cup of red onion finely chopped
1 habanero pepper, stemmed, seeded, and finely chopped
Juice of 1 lime (about 2 tablespoons)
1/8 a teaspoon of salt

Method

Slice the top of pineapple and the bottom off.  Stand the pineapple on its side and with a sharp knife, slice sides of pineapple off.  Cut the pineapple into small slices and then remove the core of each slice.  (The core tends to be hard to eat, but I’ve had some pineapples were it was soft).  Dice the remaining pineapple into small pieces.


Toss all of the ingredients into a bowl and chill for a couple of hours to let the flavors marinate.

Yellow Fin Tuna

2 thick pieces of tuna (the thicker the better, mine were about 1.5”)
1 teaspoon garlic powder
Sea Salt
Ground Pepper

Method

Season each side of the fish with garlic powder, fresh ground pepper and sea salt.  
Heat grill to medium high heat.  Grill each side for about 4-5 minutes, until inside of the fish is a nice medium rare.  Top with pineapple salsa! Enjoy!

Monday, August 1, 2011

Seared Lamb Chops with a Goat Cheese White Wine Reduction

If there is any recipe you must make at least once, this is one of them!!  I found this recipe while perusing Whole Food’s recipe data base.   This such a easy and delightful meal, it would be excellent as a weekend dinner for two, but equally wonderful served at an elegant dinner party.

I knew I was meant to make this this dish for a couple of reasons:  1) The exact moment I clicked on this recipe my husband, who was perusing the grocery ads in the paper, informed me lamb chops were on sale.  2)  I have a maaaaaaaaaajor thing for goat cheese.  And white wine.   This recipe called for all the above, perfect!  3) My husband, like many, loves red meat.   Lamb chops are a unique, yet tender and flavorful choice than the standard filet.  

Ingredients
 
Serves 4

1/2 teaspoon of freshly ground sea salt
1/4 teaspoon of freshly ground pepper (I particularly love this peppergrinder)
4 Lamb lean chops, about 1" thick (either a loin chop aka English style, the T-bone of chops, or French style, also known as loli-pops)
2 teaspoons of finely chopped rosemary
1/3 cup of dry white wine
1/4 cup of chicken stock
2 sprigs of fresh rosemary
2 oz of goat cheese

Method

These can be either grilled or broiled.  Either way would be delicious, I decided to broil for something different as I have been grilling a ton lately.  Pre-heat oven to broil.

Next chop fresh rosemary and line up the rest of your ingredients.  


For the Lamb:  Heat a cast iron skillet on high heat.  Cast iron skillets are wonderful, they are inexpensive and really make a difference.  They also have the ability to withstand high temperatures making them ideal for searing. You will know when the skillet is ready by flicking a tiny bit of water on the pan, if it sizzles, it is ready!

My husband recommends you pat each side of the meat before you sear anything.  I found it easiest to pat dry with a paper towel.  Add sea salt to one side of the lamb, and place salt side down into the skillet.  Search chops for 2-3 minutes and then flip, adding pepper to the other side.  Sear other side for 2 minutes.
Sprinkle chopped rosemary onto chops and transfer the entire skillet to the broiler.  Broil about 2-3 minutes per side.  Remove skillet from oven and relocate lamp chops to another dish.

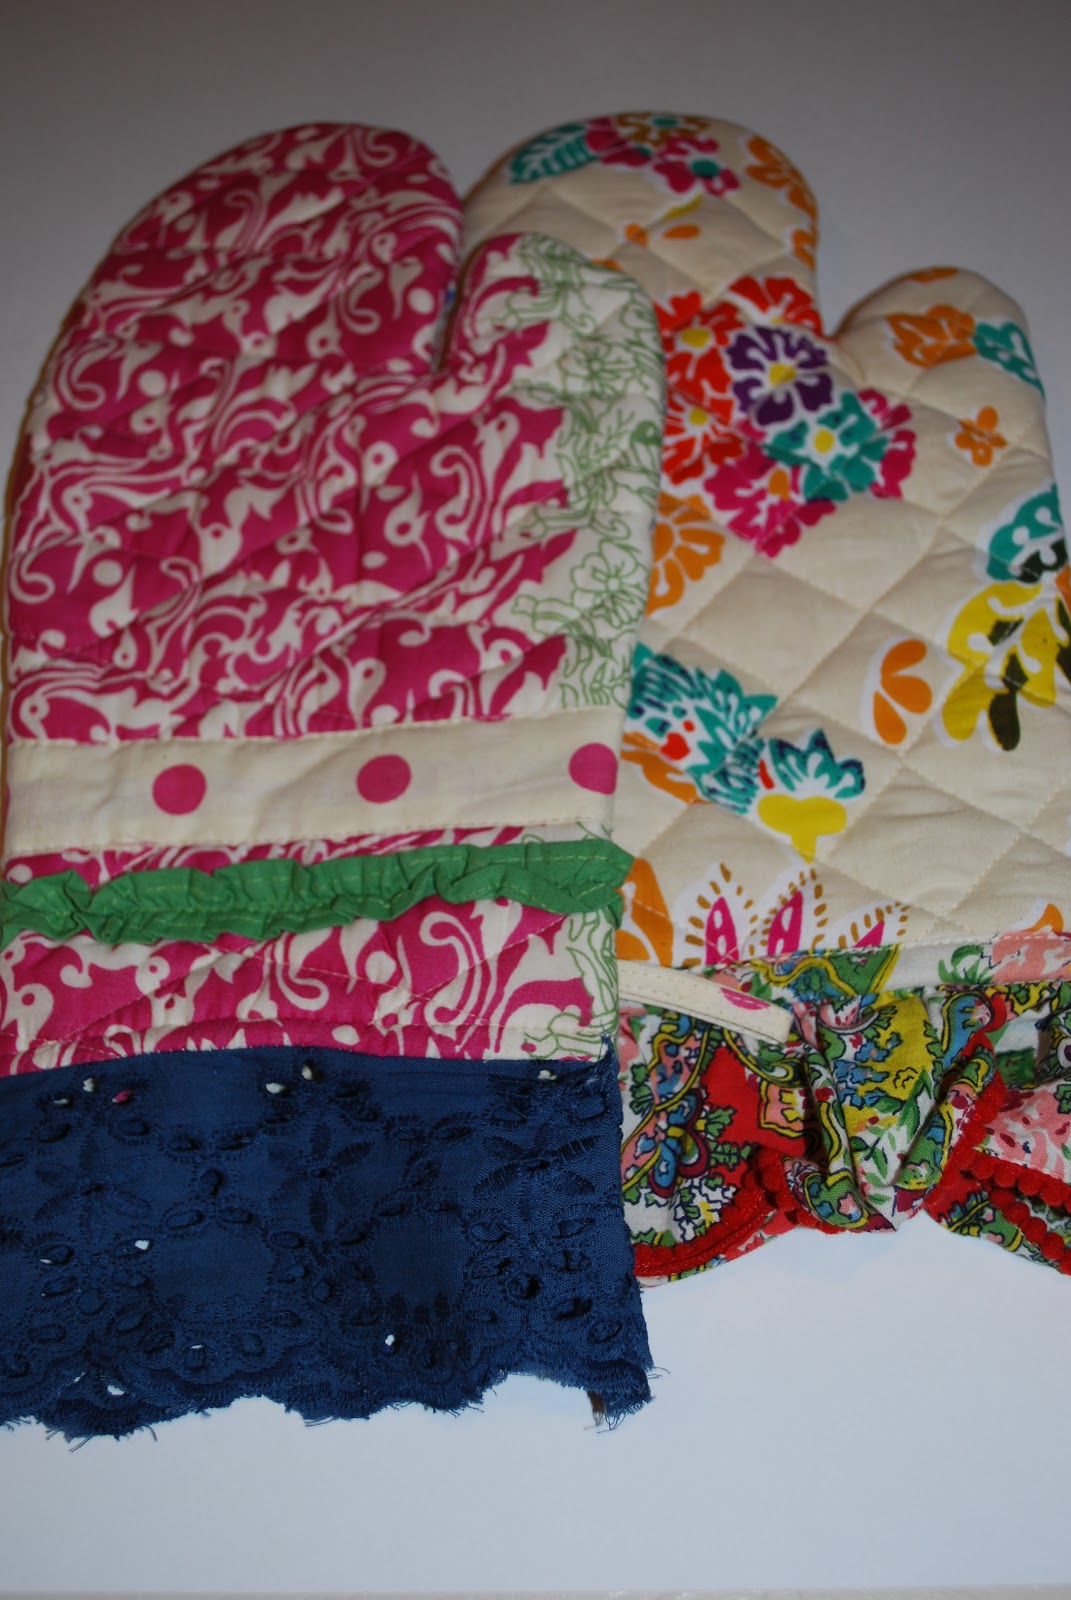
Warning:  Be careful transferring the skillet from the broiler to the stove top, the cast iron will be extremely hot.  I used my favorite new pair of oven mitts, pictured below!
Reduction:  Add white wine (you will want to use a crisp white, such as a Sauvignon Blanc, I used my latest summer find The Beach House).  Stir and scrape the brown bits off the bottom of the skillet.  Add the chicken broth and one sprig of rosemary.  Let simmer at a low boil, till reduced by 1/3.

Remove and discard the rosemary.  Swirl in the goat cheese to create a creamy sauce.

Place the lamb chops on a plate and drizzle with the reduction sauce.  Serve immediately while sauce is liquified (it liquifies fast).  Enjoy!


Follow me on Twitter @ CheesePlease531

Update: Whole Foods is proudly featuring my photography for this recipe!!  Amazing!


Friday, July 29, 2011

Grilled Rum Peaches with Mascarpone Cheese & Orange Blossom Honey

Living in the South definitely has many great advantages.  One of the many reasons I love living here is the different produce seasons, which tend to be a little be longer than where I am from in the Northeast.  What is wonderful is the Carolinas’ close proximity to the great Peach State.  Peach season in the south typically runs from mid-June through the end of September.  
This dessert recipe is one of the simplest ways to celebrate summer.  I also love a dessert that is made with rum! The mascarpone cheese instantly melts into a creamy, yummy topping that contrasts the crispness of the grilled peaches.  
To top it off, I drizzled local-made honey I purchased recently at my regional farmers market.  This honey is from the Smokey Mountain Honey House in one of my fav towns, Asheville, NC.  I served this for dessert at a recent dinner party and it was a hit!


Ingredients - Serves 2
2 ripe peaches
2 T of honey, plus extra for serving
2 ounces of mascarpone cheese, at room temperature

For the Marinade:
5 T of butter
1/4 cup of brown sugar
1/4 cup of dark rum (I used Sailor Jerry, a favorite in my household thanks to our friend Steve)
1 teaspoon of cinnamon
Pinch of salt


Method

Combine all ingredients for the rum marinade in a stove-top pan on medium high heat. Reduce heat and let simmer for 7-8 minutes, stirring occasionally.   Remove from heat and let cool.  

Prepare peaches by cutting them in half and removing the pits.  Place the peaches in a glass dish top with rum marinade.  Marinate for 30 minutes to 4 hours.  

Grill, cut side down for 3-4 minutes, then flip for another 5 minutes.  Remove from grill and top with mascarpone cheese and drizzle with honey!  Viola!
 

Let me know how this recipe works for you!  Also follow me on Twitter @CheesePlease531

Monday, July 25, 2011

Wild Mushroom and Pesto Crostini

This recipe was inspired by a dish my girlfriends and I shared at Lincoln Restaurant in Washington, DC this spring.  Since all of my closest girlfriends no longer all live in the same city, we re-united in our nation's captial to celebrate our dear friend's upcoming nuptials.  We stumbled onto Lincoln Restaurant by chance, and were glad we did.
 
 
Lincoln Restaurant is know for it's playful dedication to Abraham Lincoln in a chic, upscale way.   The theme "Food of the People, by the People, for the People" is complemented with an unusual floor made entirely from pennies, and with gorgeous back lit walls scripted with the famous Emancipation Proclamation. We were thrilled with its seasonal small plate menu and found everything delicious.

Floor of restaurant, made up of 799,997 pennies
Throughout our meal one dish really stuck out and I had to try to re-create it at home -Lincoln's mushroom bruchetta.  The only difference is Lincoln's dish included pea's and ricotta cheese and I was fresh out of both of those ingredients.  Regardless, this mushroom appetizer still turned out great!

This dish is not only delicious, it is easy to prepare, but also makes me incredibly happy thinking back to a really fun girls weekend.  Also great served as an hor' dourve at dinner parties!

Ingredients
serves 4

1/2 of a whole wheat baguette
1 1/2 cups of wild mushrooms, cleaned and sliced
1/4 cup of prepared pesto
2 tbsp of extra virgin olive oil
1 tsp of garlic, pureed or minced
2 tbsp of freshly grated Parmesan cheese 
Salt and Pepper to taste

Heat olive oil in a large skillet.  Add garlic and saute for 2-3 minutes until brown over medium-high heat.  Add mushrooms and saute for 8-10 minutes until thoroughly cooked.  Remove from heat and add sauteed mushrooms to a small mixing bowl of prepared pesto.  Toss until mushrooms are evenly coated.  Slice whole wheat baguette in half length-wise and then cut into small 1/2 inch slices.   Toast until golden brown and then top with mushrooms and Parmesan.  Enjoy!

Me and my girls @LincolnWDC

Follow me on Twitter @Cheeseplease531


Sunday, July 24, 2011

Perfect Pesto

One of the things I love the most about cooking is not just preparing fresh, healthy and delicious food, it is also the thrill of learning how to cook something new!!  A few years ago I discovered pesto for the first time (shocking, I know, but I used to be the pickiest eater)  and it was love at first sight.  The combination of a long favorite of mine, garlic, combined with a new favorite, basil, in addition to toasty nuts and parmesan cheese equaled heaven to my palette!

While I was shopping at our local farmer's market, I purchased two big bags of fresh basil for a dollar each, much less expensive than the grocery store, and much more leaves than my 'lil basil plant in the backyard.  (None of my potted herbs this summer are holding up well against these recent heat waves, any suggestions to keep my plants alive would be welcomed!)  Regardless, I was so excited about seeing these large bags of basil, I knew I had to try to make my own pesto!  Below is the winning combination that not only appeased my friends but also my husband.


Jess' Perfect Pesto

3 cups of fresh basil
1 cup of Italian parsley*
1/2 cup of pine nuts, toasted till golden
1/4 cup of freshly grated good quality parmesan
3 large garlic cloves (or 3 tbsp of minced garlic)
1/4 cup of extra virgin olive oil, add up to 3 more tablespoons if desired

I decided to blanch my basil leaves.  Blanching is great to do if you want to freeze some pesto for later, and it also brightens up the color of your pesto.  It is easy to blanch - bring a pot of water to boil, and preparing a bowl of icy water.  Pick a bunch of basil with kitchen tongs and immerse in the hot water for 2-3 seconds.  Then submerge basil in the ice bath.  Blanching basil leaves is apparently controversial, but it really comes down to the condition of your ingredients.  If your basil looks great, is fresh and fragrant, skip this step!

*I found that mixing in some fresh parsley into this recipe not only gave it a great flavor, it also gave the pesto a beautiful color.

Combine all ingredients in a food processor and process for about 30 seconds.   I just adore my Cuisinart 9-cup food processor.  Thank you Julie and Steve for the fabulous gift!!


Enjoy!!! Pesto is such a great addition to any of your summer recipes!  Let me know if you have any favorite pesto recipes, I have been on whirlwind of preparing pesto dishes lately!

Remember to follow me on Twitter @CheesePlease531
Caprese Panini
Chicken Pesto Campanelle
Heirloom Tomato & Pesto on a Whole Wheat Baguette

Tuesday, July 19, 2011

Berry Parfait

To continue with my recent changed-up breakfast routine, I had to share this simple and healthy breakfast parfait.  Strawberries are a great source of Folate, Potassium and Vitamin C.  It is berry delicious!  

3/4 cup of plain non-fat greek yogurt (Chobani is my favorite)
1/2 cup of granola
1 teaspoon of ground flax seed
1 cup of sliced strawberries
1/2 cup of blueberries
1 T of honey drizzled


I am off to Charlotte's regional farmers market after lunch today with my friend Ellen, I am hoping to stumble on inspiration for a new dish.  Stay tuned!

Follow me on Twitter @CheesePlease531

Monday, July 18, 2011

Blueberry Oatmeal Muffins with Lemon

Sometimes you need to change a pace from your daily breakfast routine.  Chris and I usually start each morning off with some type of egg whites.  Typically it is a combo of turkey, egg whites, and whatever fresh vegetables are in the fridge.  However, I was craving something different and fell in love with this healthy but filling breakfast option!  Full of antioxidant rich blueberries and heart healthy oatmeal, this recipe is also great as a snack. 

Makes 12 Muffins

1 1/4 cup oats (regular or steel cut)
1 cup of white whole wheat  flour (milder in flavor than traditional whole wheat flour)
1 T baking powder
1/2 tsp sea salt
1/3 cup baking splenda or sugar
1 T fresh lemon zest
1 T of vanilla
1 egg or 2 egg whites
1 cup of skim milk
1/4 cup of vegetable oil
1 cup fresh blueberries (if frozen defrost first)

*Recipe inspiration from Kalyn's Kitchen, one of my favorite health food blogs!

Combine all dry ingredients in a small bowl.  In a separate bowl combine egg, milk, oil, and vanilla.  Slowly add liquids to they dry ingredients.  Pour in a 12 cup muffin pan 3/4 up to the top.  Bake at 400 for 15-20 minutes.  Let cool on a wire rack.


Update:  I made these again and believe they are even better with a "topping"  Reserve a few tablespoons of oats and combine with 1 tablespoon of brown sugar.  After muffins are poured into the muffin pan, top each muffin with oats and brown sugar mixture.  


Follow me on Twitter @CheesePlease531!!

Monday, October 11, 2010

Chicken & Sun Dried Tomato Pizza

This recipe is adapted from Rachel Ray, and is great for when you want to shake things up for dinner! You can purchase whole wheat pizza dough, or use 8" whole wheat flat breads for the crust.

1/2 lb cooked chicken breast (or tenders)
2 teaspoons extra virgin olive oil
2 tablespoons grated parmigiana-reggiano
2 cloves of garlic
1/4 cup part skim ricotta cheese
8 sun dried tomatoes in oil, drained and sliced
1 cup of part skim shredded mozzarella cheese
1/4 of sauteed baby bella mushrooms
1/4 cup of sauteed yellow onion
Salt & pepper
12 fresh basil leaves, torn or thinly chopped

Brush pizza dough or flat bread with olive oil, parm cheese, salt and pepper. In a separate pan saute chicken with olive oil, garlic and salt/pepper. Remove from heat and slice into small pieces. Add chicken, mushrooms, and onions to crust. Dob spoonfuls of ricotta onto the pizza and spread with the back of the spoon. Add sliced sun dried tomatoes and shredded mozzarella cheese. Bake at 375 degrees for 8-10 mins. Top with the shredded fresh basil (I highly recommend not skipping this step, it makes a huge difference!). ENJOY!!!!!!!

Follow me on Twitter @CheesePlease531

Sunday, September 12, 2010

Cheese Please is Back!!!

Due to an extended summer, and the fact that my husband told me writing for Cheese Please is NOT considered a "real job" (j/k, but it was really funny to see the look on his face), I took some time off to update my resume and begin my search for a new career in Charlotte. I also did quite a lot of traveling to see friends and family.

STAY TUNED! More fabulous and cheesy recipes coming soon!